2015年1月30日星期五

6 reasons why people don’t get their broken cellphone fixed in repair shop

6 reasons why people don’t get their broken cellphone fixed in repair shop


ATTENTION!!!!
1.Everyone can use this coupon code: ETS3D7DK for orders on www.etradesupply.com over $50.
2.Everyone can use this coupon can use it only once.
3.The due date of this coupon is February 10, 2015


Because the smartphones are more expensive than feature phones. People are more willing to repair the phones rather than replace them. However, repair shop owners or technicians have met a lot of people with different reasons who didn’t want to get their cellphones fixed in the repair shop. We concludes the 6 reasons here.
Mobile phone with robot
1. “My cellphone can only be fixed by certified technicians”
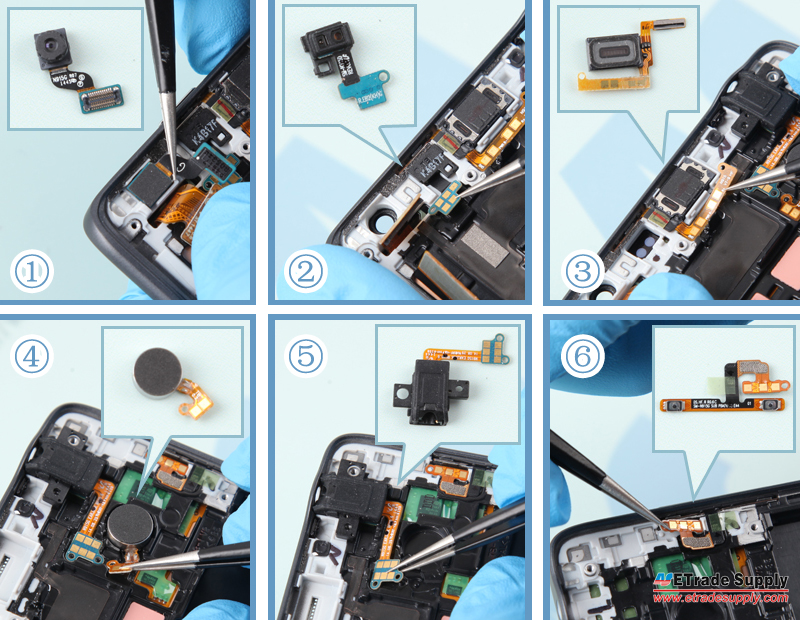
Many people think that only the certified person can do the repair work, but actually, it’s not that hard to tear down or reassemble a cellphone for an experienced technician. There are many self-taught technicians in the industry who haven’t attended a single training course because of the high course tuition. But they have fixed tons of cellphone without error in no time flat.
On the other hand, some technicians do need to go back to the repair training school to spend more time on this stuff to improve his skills. Under this circumstance, customer had better scan the repair shop’s customer reviews before making the decision.
2. “If I let a third-party repair shop to fix my cellphone, the warranty of my cellphone will be voided.”
In fact, if customers’ iPhone or Samsung smartphone has been broken or had any other damages,the-limited-one-year-warranty of your phone is invalid. The post-sale service of the cellphone company will charge more for repairing the phone than the so-called non-authorized repair shops. Even they will try to persuade you to replace a brand new device instead of repairing, which will cost more.
3.“it cost too much to repair my cellphone”
Customers will pay the price of all parts when they buy a new cellphone, while they only have to pay several parts if they choose to repair it. And absolutely, the old one functions as well as the new one. What’s more, you don’t need to transfer the data in your old phone any more.
4.“You want $200 to fix my phone? But I only paid $100 for it!”
This is a common misconception about smartphone repair among consumers. Service providers offer the iPhone or GS5 at a subsidized rate when customer signed a 2-year contract. When they look back to this kind of discount, the price they paid is far over the original price.
Some repair shop owners ever said, if customers wouldn’t mind to sign a two-year contract, they would repair the broken phones for free.
5.“My phone cannot be fixed”
Everything can be fixed, if we want. Even the earth.
6.“I can fix this phone myself, no problem!”
Some people watched the 10-mins repair tutorial video, then think they are technicians. However, real technicians have spent years honing their skills of repairing all kinds of devices. This kind of customers won’t follow a qualified person’s advice until they make the situation worse.

2015年1月29日星期四

Does Your iPhone 6 Need A Protective Case?

Does Your iPhone 6 Need A Protective Case?


Everyone can use only once this coupon code: ETS3D7DK for extra discounts on http://www.etradesupply.com  on order over $50 before February 10, 2015


iPhone-6-Bumper-Case
Since the iPhone 6 released in September 2014, a heated topic about whether the phone needs a protective case or not has been raised among forums and social media platforms. Does your iPhone 6 need a protective case? Here are my thoughts:
The iPhone 6 is scratch proof whether we’re talking about from the screen or the housing. The iPhone 6’s screen is made of an LED-backlit IPS LCD with capacitive Touch Screen that is protected by shatterproof glass. Plus, the iPhone 6’s aluminum body is not easily cracked.
Apart from that, the iPhone 6’s home button and raised back facing camera are protected by sapphire lens, which are strong enough to stand any scratches except from diamonds.
Many users report that their iPhone 6’s signal weakens or the buttons are not so sensitive while the phone is in a protective case. Well, that depends. The iPhone 6’s two plastic stripes on therear housing are antennas that help to receive wireless signals. Signals maybe blocked to some extent if the phone has a case on. Besides, button response would certainly be affected if they are covered.
However, a protective case would certainly protect your iPhone 6 from scratches. Foremost, it stops you from constantly worrying about your iPhone 6 being scratched especially after accidental drops.
For me, an aluminum bumper frame is the top suggestions if a protective case is a must. It not only solves the problems mentioned above of having a protective case, but also retains the comfortable feeling of holding an iPhone 6 and as a bonus retains the beauty of the iPhone 6.

2015年1月28日星期三

Rumors: “iPad Pro” Come With A Stylus?

Rumors: “iPad Pro” Come With A Stylus?


Everyone can use only once this coupon code: ETS3D7DK for extra discounts on http://www.etradesupply.com  on order over $50 before February 10, 2015

Apple is likely to launch a stylus to match with it’s long-rumored 12.9-inch “iPad Pro”. This stylus could enhance the user experience because it’s more precise than using a person’s fingers. The iPad is a perfect tool to do creative works for artists, but it’ll be better if the iPad can catch their inspiration more accurately.
 Apple-iPen
Ming-Chi Kuo, who has correctly predicted that the iPad Air 2 would sport a laminated screen with an anti-reflection coating and a Touch ID fingerprint scanner, said the stylus will not be bundled with “iPad Pro” initially but as an optional add-on, while Apple fans may not accept the high price bumped up by the optional accessory. The stylus is also expected to be simple without eyecatching functions in the first year. But many techies claimed that if a stylus sports gyroscope and can make notes across the air, the purported iPen would be more popular in the market. However, We may have to wait for some time till it come out. Kuo also think that the pen will probably be charged with a lightning connector so as to reduce design difficulty and costs.
The stylus was claimed to be released in the second quarter of this year. It will come out with thelong-rumored “iPad Pro” . The larger-screened iPad may aim at enterprise market, sport 12.2 to 12.9 inches high resolution display, A8X processor, 2GB RAM and Touch ID fingerprint scanner. However, all we have known is just rumors now. Let’s stay tuned and see.

2015年1月27日星期二

Samsung Galaxy S6 Will Be Released On March 2nd

Samsung Galaxy S6 Will Be Released On March 2nd


Everyone can use only once this coupon code: ETS3D7DK for extra discounts on http://www.etradesupply.com  on order over $50 before February 10, 2015


Samsung’s senior official has claimed that the Samsung Galaxy S6 will be released at MWC 2015 on the 2nd of March.
 Samsung Galaxy S6
The purported Samsung Galaxy will sport a Super AMOLED Capacitive touchscreen, 5.2 inches with the latest Corning Gorilla Glass 4, a display with resolution of 1440*2560, Quad-core 1.3 GHz Cortex-A53 & Quad-core 1.9 GHz Cortex-A57, a Exynos 7420 chipset, the latest Android lollipop OS, a 20MP rear facing camera and a 5MP front facing camera.
However, according to the insiders, Samsung’s Galaxy S6 and Galaxy S6 Edge will not be waterproof as with the Galaxy S5. We can’t figure out why Samsung cut out the function, but, perhaps, it’s possible for Samsung to release a Galaxy S6 Active, which supports water resistance.

2015年1月25日星期日

How to Repair A Samsung Galaxy Note 4 Screen

How to Repair A Samsung Galaxy Note 4 Screen


ATTENTION!!!!
1.Everyone can use this coupon code: ETS3D7DK for orders on www.etradesupply.com over $50.
2.Everyone can use this coupon can use it only once.
3.The due date of this coupon is February 10, 2015.


Here we show you how to repair your Samsung Galaxy Note 4 screen step by step. According to our experience, broken screens are the most common issue among our customers and the average Samsung smartphone user, so we hope this article helps. Please share this with your friends and family if you find it helpful. All Samsung Galaxy Note users can use this article as a guide as the repair process is nearly the same.
Tools Needed:
1. Tweezers;
2. Ph00 Phillips Screwdriver
3. Hairdryer/Heat Gun;
4. Case Opening Tool;
Replacement needed:

● Power off the device;
● Pull out the S Pen stylus;
● Pull the battery door out through the small gap between the power button and the battery door.
 Note 4 Battery Door Off 2
 2. Remove the Galaxy Note 4 Battery.
 Note 4 Battery Door
 3. Remove the Galaxy Note 4 Rear Housing.
● Undo the 16 screws in the rear housing;
● Insert the case opening tool to take out the rear housing.
Notice: The loudspeaker assembly is located in the rear housing and difficult to remove.
 Note 4 Rear Housing Screw Off
 Note 4 LCD Assembly Off
4. Remove the Galaxy Note 4 Motherboard.
● Pry up the 4 connectors;
●  Undo the screw;
●  Remove the upper portion of main board and pry up the connector.
 Note 4 Motherboard Off
Note 4 Motherboard Off 2
5. Remove the Galaxy Note 4 Small Parts.
● Remove the ear speaker with flex;
Note 4 Vibrating Motor Off
● Pry up the 2 connectors;
●  Undo the screw;
●  Pry up the charging port assembly and then pry up the two connectors.
 Note 4 Charging Port Flex Off
3. Connect the charging port assembly to the middle plate
 7. Remove the Galaxy Note 4 Middle Plate.
● Heat up the LCD and Digitizer assembly for 2 minutes to soften the adhesive;
●  Insert the case opening tool to remove the middle plate.
 Note 4 front housing off
Notice:  At this step, you have torn down the broken LCD screen and digitizer assembly, then you can replace a BRAND NEW Samsung Galaxy Note 4 LCD screen and digitizer assembly.
8. Adhere Samsung Galaxy Note 4 front housing adhesive to the middle plate, then connect the LCD screen flex cable and digitizer flex cable to the mother board.
 16._1_connect the LCD screen flex cable and digitizer flex cable to the mother board.
 9. Insert the vibrating motor with power button flex in the slot.
 7. Insert the vibrating motor with power button flex in the slot.
10. Put the ear speaker with flex into the slot.
 8. Put the earphone speaker flex into the slot.
11. Put the mother board in the slot and connect the Galaxy Note 4 Charging Port Assembly to the mother board.
 10. Put the mother board in the slot and connect the charging port assembly to the mother board.
12. Connect the ear speaker with flex cable to mother board.
 11. Connect the ear speaker flex cable to mother board.
13. Connect the home button flex ribbon to the mother board.
 12. Connect the home button flex cable to the mother board.
14. Connect 2 antennas to mother board.
 13. _1_Connect 2 antennas to mother board. 13. _2_Connect 2 antennas to mother board.
 15. Fasten 1 screw in the charging port assembly.
 14. Fasten 1 screw in the charging port assembly.
16. Fasten 1 screw in the mother board.
 15. Fasten 1 screw in the mother board.
17. Cover the rear housing and fasten 16 screws in the rear housing.
 19.1fasten 16 screws in the rear housing.
18. Put the battery in and insert the stylus to the rear housing.
 20.-1- Put the battery in 20.-2-insert the stylus
19. Cover the battery door, then you have replaced the Samsung Galaxy Note 4 LCD screen and digitizer assembly.

2015年1月23日星期五

How To Repair A Broken Galaxy Note Edge Screen

How To Repair A Broken Galaxy Note Edge Screen


Everyone can Use Coupon Code(ETS3D7DK) for orders over $50 to buy brand new original cellphone replacement parts at www.etradesupply.com

Smartphone screens are still easily damaged after sudden drops even though they’re protected by advanced glass and cases. Is this curved display Galaxy Note Edge hard to repair? Here we walk you through how to repair a broken Galaxy Note Edge screen.

1. Tweezers;
Note Edge Disassembly
1. Remove the Galaxy Note Edge S Pen.
● Power off the device;
● Pull out the S Pen stylus.
Note Edge S Pen Off
● Pull the battery door out through the small gap between the power button and the battery door.
Note Edge Battery Door Off
3. Remove the Galaxy Note Edge Battery.
Note Edge Battery Off
● Undo the 15 screws in the rear housing;
● Insert the case opening tool to take out the rear housing.
(Notice: The loudspeaker assembly is located in the rear housing and difficult to remove.)
Note Edge Rear Housing Screw Off
Note Edge Rear Housing Off
5. Remove the Galaxy Note Edge Motherboard.
● Pry up the 5 connectors;
● Release the upper portion of the motherboard;
● Pry up the connector on the back of the board to release the bottom part of motherboard.
Note Edge Motherboard Connectors Off
Note Edge Motherboard Connectors Off 2
6. Remove the Galaxy Note Edge Charging Port Flex Assembly.
● Pry up the 3 connectors;
● Undo the screw;
● Release the USB charger port flex assembly.
Note Edge Charging Port Flex Off
8. Remove Small Parts from the Galaxy Note Edge.
● Remove the front facing camera;
● Remove the proximity sensor;
● Remove the vibrating motor;
● Remove the earphone jack;
● Remove the volume button flex.
(Notice: The power button and volume button are assembled in the front housing and not easily removed.)
Note Edge Front Housing Small Partd Off
Note Edge Side Keys
The Galaxy Note Edge disassembly is now completed. Please note the front housing is attached to the Galaxy Note Edge LCD Touch Screen by a very strong adhesive, we do not recommend attempting to separate the frame from the LCD assembly, as it’s very difficult with a high risk of breakage. Thus, replace the cracked Galaxy Note Edge screen with a new one in reverse orders.

How to reassemble Samsung Galaxy Note 4

How to reassemble Samsung Galaxy Note 4


Everyone can Use Coupon Code(ETS3D7DK) for orders over $50 to buy brand new original cellphone replacement parts at www.etradesupply.com

At the first glance, you’ll easily find that the Samsung Galaxy Note 4 inherits the design and the great figuration of Galaxy Note series. After tearing down Samsung Galaxy Note 4, we found it’s very easy to repair. Compared with Samsung Galaxy Note Edge, it’s not only easier for you to use (The curve-display is not easy to hold) but also easier to be repaired. Here we show you how to reassemble Samsung Galaxy Note 4 step by step, just in 10 minutes. 
1. Put the ear speaker mesh cover in the middle plate.
2. Insert the home button flex ribbon in the middle plate.
2. Insert the home button flex ribbon in the middle plate.
3. Connect the charging port assembly to the middle plate.
3. Connect the charging port assembly to the middle plate
4. Assemble the plastic bracket with front facing camera.
5. Connect the rear facing camera to the mother board.
5. Connect the rear facing camera to the mother board.
6. Connect the front facing camera to the mother board.
6.Connect the front facing camera to the mother board.
7. Insert the 5 antenna chips in slots. (Notice: The 5 signal chips are different in shape, be careful not to place in the wrong position when reassembling.)
6. Insert the 5 antenna chips in slots.
8.  Insert the vibrating motor with power button flex in the slot.
7. Insert the vibrating motor with power button flex in the slot.
9. Put the ear speaker flex into the slot.
8. Put the earphone speaker flex into the slot.
 10. Put the volume key flex into the slot.
9. Put the volume key flex into the slot.
11. Put the mother board in the slot and connect the charging port assembly to the mother board.
10. Put the mother board in the slot and connect the charging port assembly to the mother board.
 12. Connect the ear speaker flex cable to mother board.
11. Connect the ear speaker flex cable to mother board.
13. Connect the home button flex cable to the mother board.
12. Connect the home button flex cable to the mother board.
14. Connect 2 antennas to mother board. 
13. _1_Connect 2 antennas to mother board. 13. _2_Connect 2 antennas to mother board.
15. Fasten 1 screw in the charging port assembly.
14. Fasten 1 screw in the charging port assembly.
 16. Fasten 1 screw in the mother board. 
15. Fasten 1 screw in the mother board.
 17. Adhere Samsung Galaxy Note 4 front housing adhesive to the middle plate. Intall the LCD screen and digitzer assembly,  then connect the LCD screen flex cable and digitizer flex cable to the mother board.
16._1_connect the LCD screen flex cable and digitizer flex cable to the mother board.
16._2_connect the LCD screen flex cable and digitizer flex cable to the mother board
 18. Insert the volume key and power key.
17-1-Insert the volume key and power key.
17-2-Insert the volume key and power key.
 19. Insert the earphone jack.
 18. Insert the earphone jack.
 20. Cover the rear housing and fasten 16 screws in the rear housing.
19.1fasten 16 screws in the rear housing.
 21. Put the battery in and insert the stylus to the rear housing.
20.-1- Put the battery in
20.-2-insert the stylus
 22. Cover the battery door, then the reassembly is completely.