How To Repair A Nexus 6 Cracked Screen
ATTENTION!!!!
1.Everyone can use this coupon code: ETS3D7DK for orders on www.etradesupply.com over $50.
2.Everyone can use this coupon can use it only once.
3.The due date of this coupon is February 10, 2015
Cracked screens are still a common problem for all of the newest phones, even if the Motorola Nexus 6 features an AMOLED capacitive touch screen and is protected by Corning Gorilla Glass 3. Whether your device has a crack on the glass lens, LCD display or digitizer touch screen, we’d suggest you to replace the hermetically sealed LCD assembly with Frame, as it’s much easier to do and you have a lower risk of more damage. Here we walk you through how to replace a broken Nexus 6 screen.
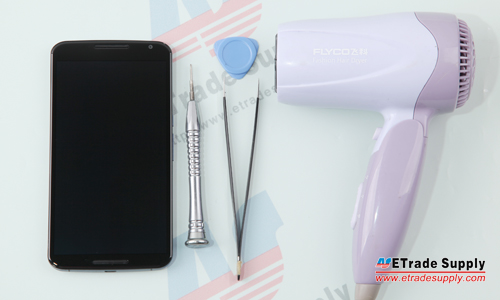
Tools Needed:
1. Hair Dryer / Heat Gun;
2. Tweezers;
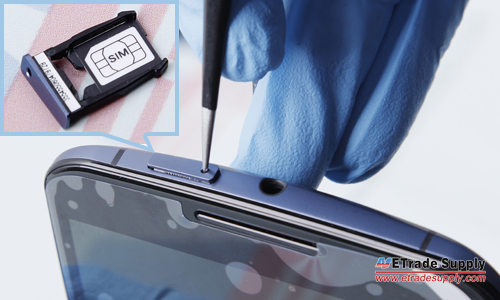
1. Remove the Motorola Nexus 6 SIM Card Tray.
● Power off the device;
● Use an eject pin or tweezers to release the SIM card tray.
2. Remove the Motorola Nexus 6 Battery Door.
● Heat up the battery door for 2 minutes to soften the battery door adhesive;
● Insert the case opening tool and pry up the battery door.

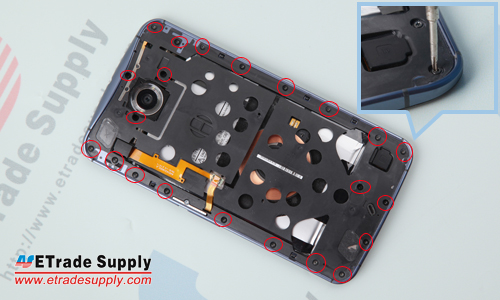
3. Remove the Motorola Nexus 6 Rear Housing Assembly.
● Undo the 22 screws in the rear housing as shown below;
● Gently remove the rear housing assembly from the screen assembly.
4. Release the Connectors in the Rear Housing.
● Remove the gasket on the rear housing near the bottom of the phone;
● Carefully pry up the flex ribbon connector underneath;
● Remove the gasket on the rear housing near the top of the phone;
● Carefully pry up the flex ribbon connector underneath.
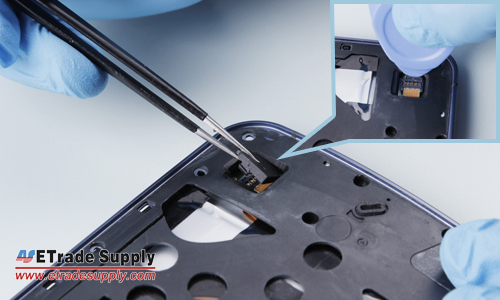
5. Release the Flex Cable Ribbon Extender.
● Carefully pry up the latch on the flex connector to separate it from the flex ribbon extender.
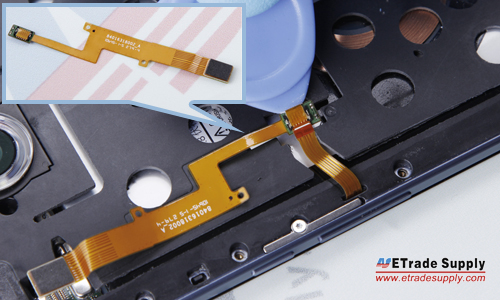
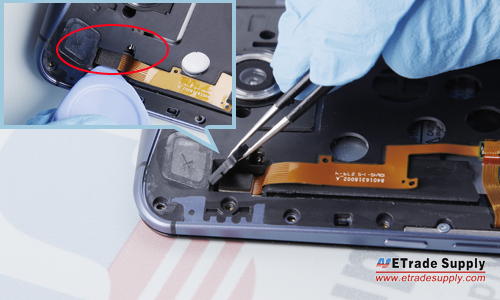
6. Remove the Motorola Nexus 6 Motherboard.
● Undo the screw and metal bracket that locks the front housing and main board;
● Pry up the LCD flex connector and digitizer connector;
● Remove the motherboard.
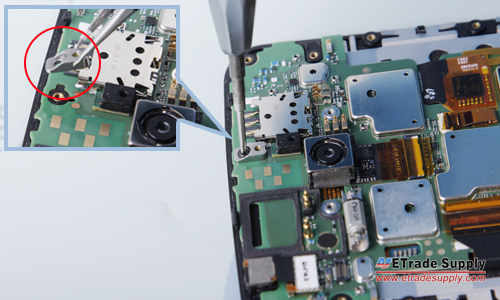

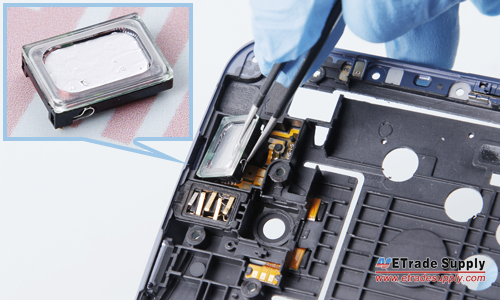
7. Remove the Motorola Nexus 6 Ear Speaker and Headphone Jack.
● Remove the front speaker.
(Notice: be careful not to scratch the flex ribbon underneath.)
● Remove the headphone jack.
(Notice: the headphone jack is strongly attached to the front housing with an adhesive.)

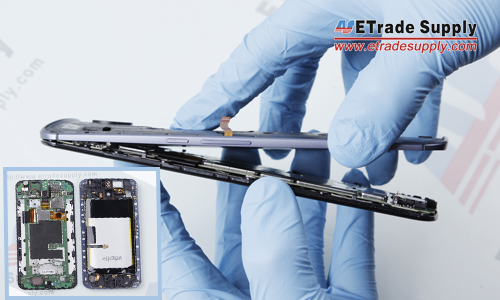
After removing the front speaker and headphone jack, the necessary disassembly work for replacing a broken screen is finished. Now replace the broken screen with a brand new original Motorola Nexus 6 LCD Screen and Digitizer Assembly with Frame replacement in reverse order.
没有评论:
发表评论