Everyone can use only once this coupon code: ETS3D7DK for extra discounts on http://www.etradesupply.com on order over $50
2015年2月11日星期三
Samsung Galaxy Note Edge Reassemble
Everyone can use only once this coupon code: ETS3D7DK for extra discounts on http://www.etradesupply.com on order over $50

2015年1月23日星期五
How to reassemble Samsung Galaxy Note 4
How to reassemble Samsung Galaxy Note 4
Everyone can Use Coupon Code(ETS3D7DK) for orders over $50 to buy brand new original cellphone replacement parts at www.etradesupply.com
At the first glance, you’ll easily find that the Samsung Galaxy Note 4 inherits the design and the great figuration of Galaxy Note series. After tearing down Samsung Galaxy Note 4, we found it’s very easy to repair. Compared with Samsung Galaxy Note Edge, it’s not only easier for you to use (The curve-display is not easy to hold) but also easier to be repaired. Here we show you how to reassemble Samsung Galaxy Note 4 step by step, just in 10 minutes.

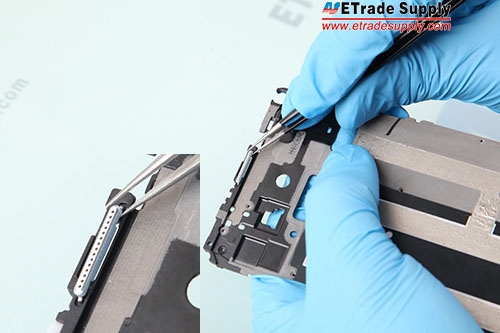
2. Insert the home button flex ribbon in the middle plate.
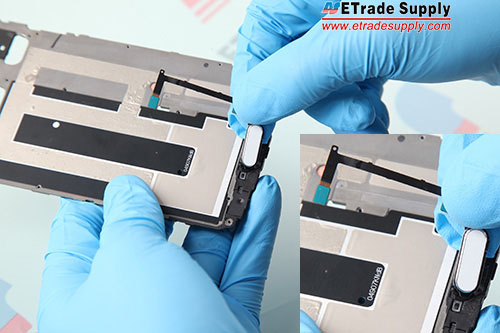
3. Connect the charging port assembly to the middle plate.
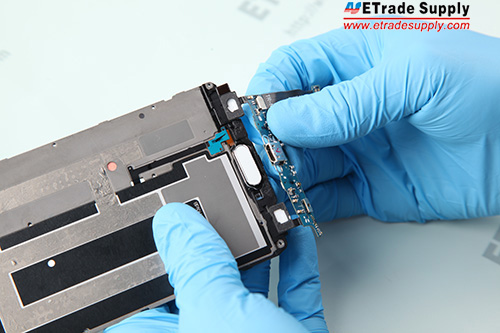
4. Assemble the plastic bracket with front facing camera.
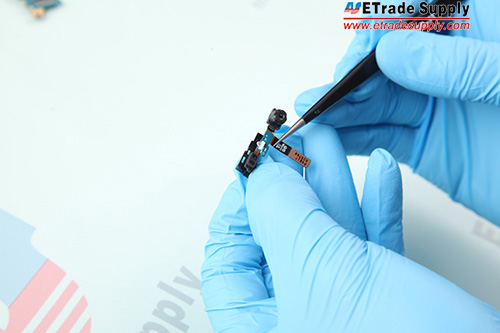
5. Connect the rear facing camera to the mother board.
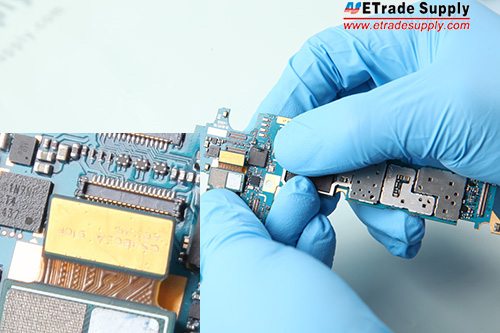
6. Connect the front facing camera to the mother board.
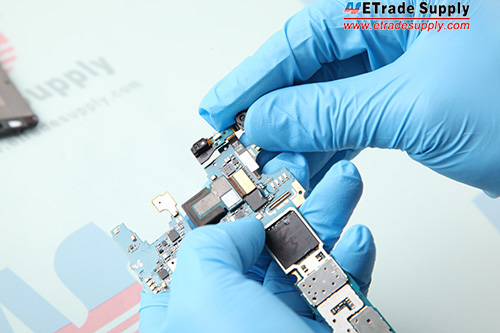
7. Insert the 5 antenna chips in slots. (Notice: The 5 signal chips are different in shape, be careful not to place in the wrong position when reassembling.)
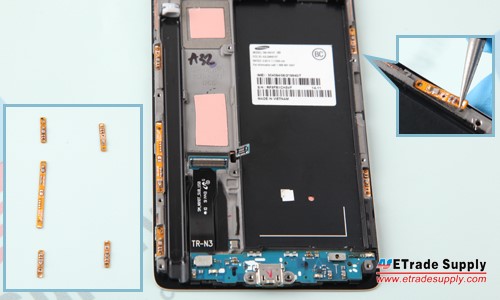
8. Insert the vibrating motor with power button flex in the slot.
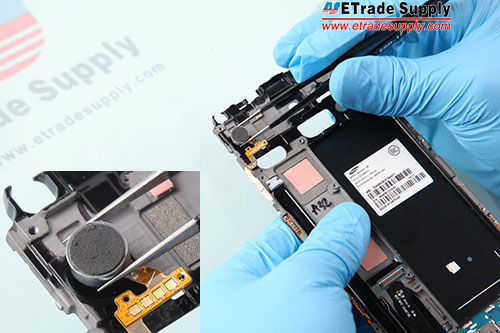
9. Put the ear speaker flex into the slot.
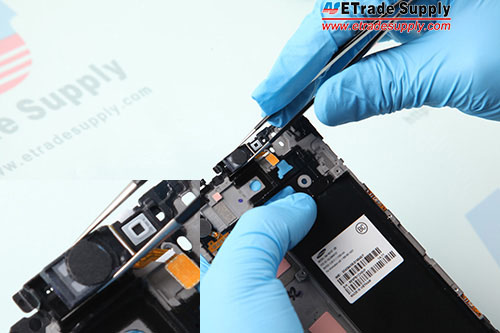
10. Put the volume key flex into the slot.
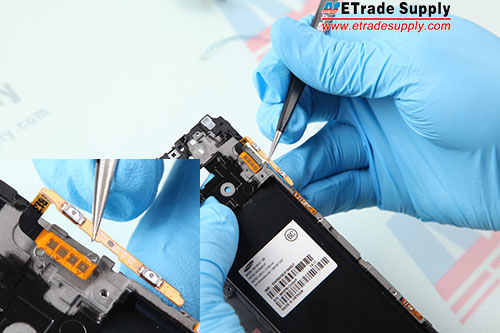
11. Put the mother board in the slot and connect the charging port assembly to the mother board.
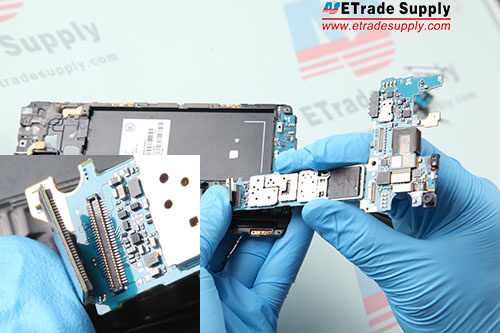
12. Connect the ear speaker flex cable to mother board.
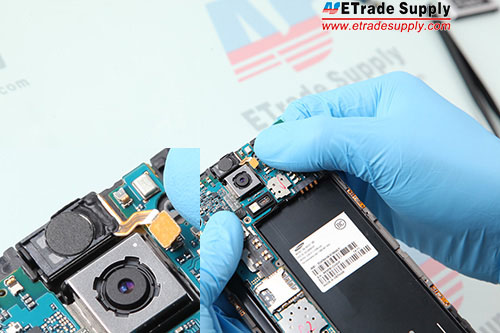
13. Connect the home button flex cable to the mother board.
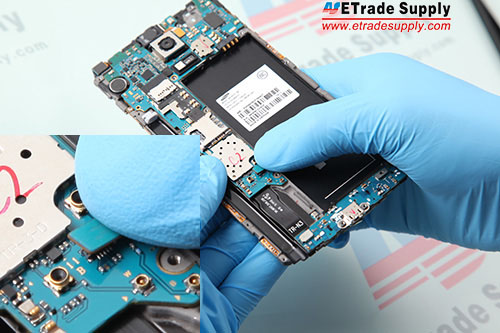
14. Connect 2 antennas to mother board.
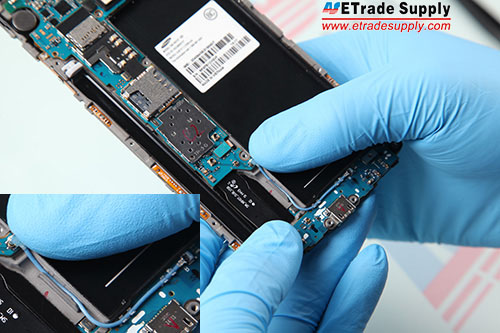
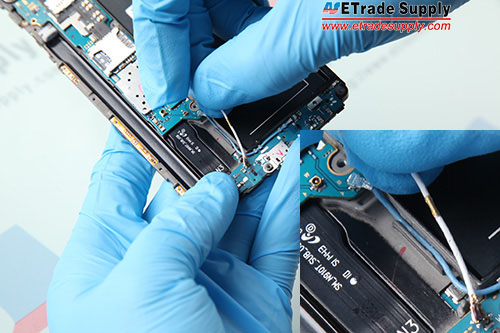
15. Fasten 1 screw in the charging port assembly.
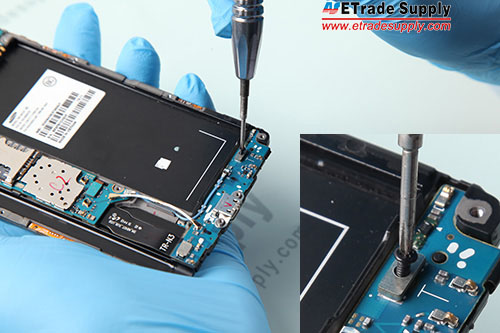
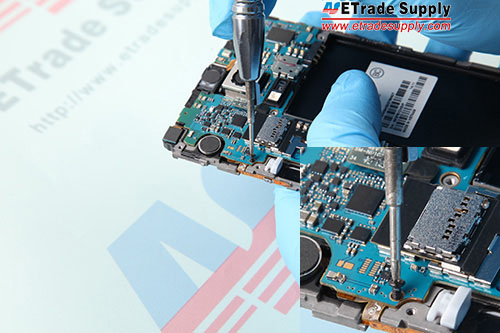
16. Fasten 1 screw in the mother board.
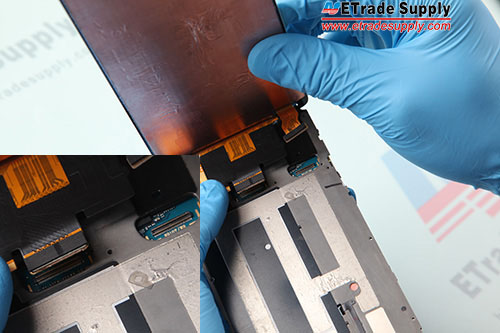
17. Adhere Samsung Galaxy Note 4 front housing adhesive to the middle plate. Intall the LCD screen and digitzer assembly, then connect the LCD screen flex cable and digitizer flex cable to the mother board.

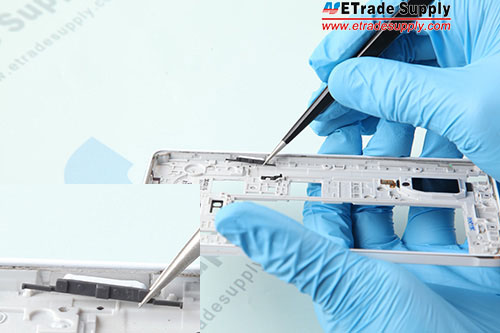
18. Insert the volume key and power key.

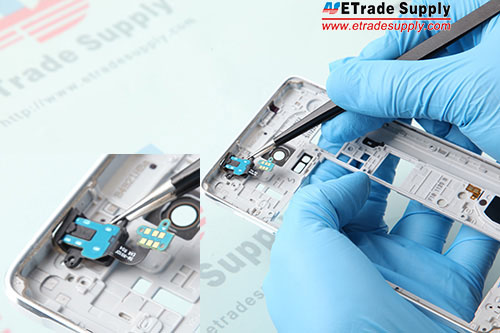
19. Insert the earphone jack.
20. Cover the rear housing and fasten 16 screws in the rear housing.
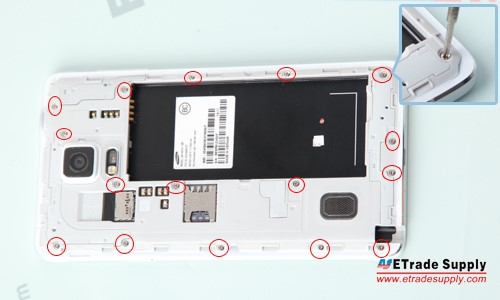
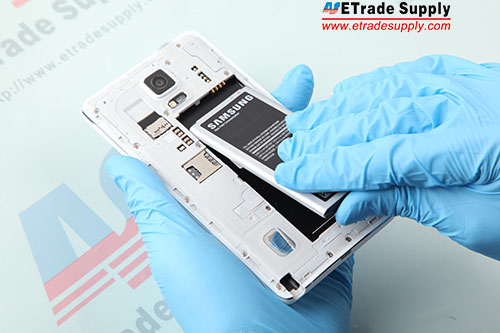
21. Put the battery in and insert the stylus to the rear housing.
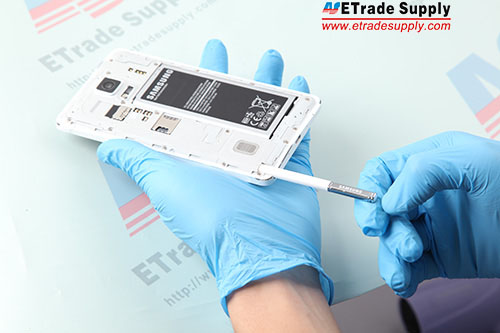
22. Cover the battery door, then the reassembly is completely.
2015年1月21日星期三
How to Reassemble Samsung Galaxy Note Edge
How to Reassemble Samsung Galaxy Note Edge
Everyone can use only once this coupon code: ETS3D7DK for extra discounts on http://www.etradesupply.com on order over $50 before February 10, 2015
When we disassembled the Samsung Galaxy Note Edge, we found the curve-display design make it more difficult to tear down. Also, compared to the Samsung Galaxy series flat-display devices, it’s easier to be crashed and more difficult to repair. Here we show you how to reassemble the smartphone and we still recommend people who has related DIY skill and experience to do it.
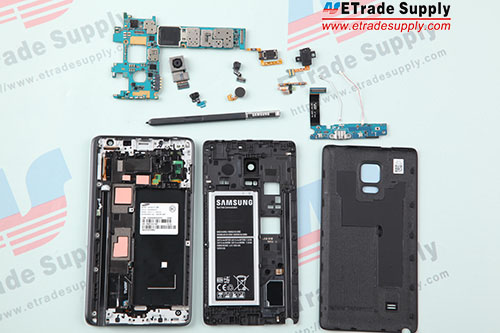
Tools Needed:
1. Tweezers;
1. Connect 2 antennas to the charging port flex assembly, then put the charging port flex assembly into the front housing.
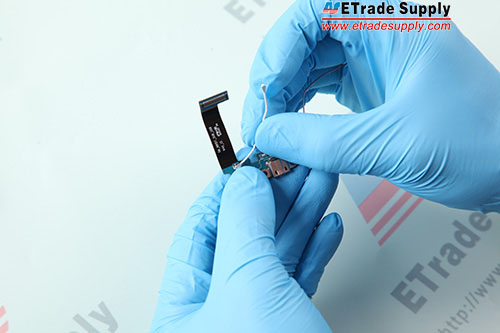
2. Connect the home button flex cable to the charging port flex assembly, then fasten 1 screw in the charging port flex assembly.
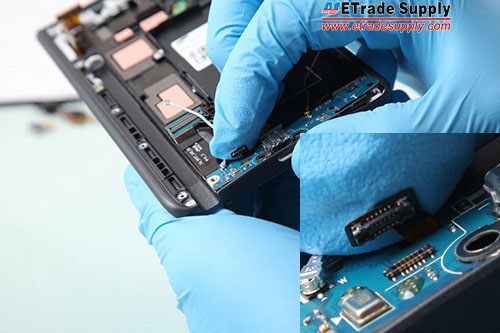
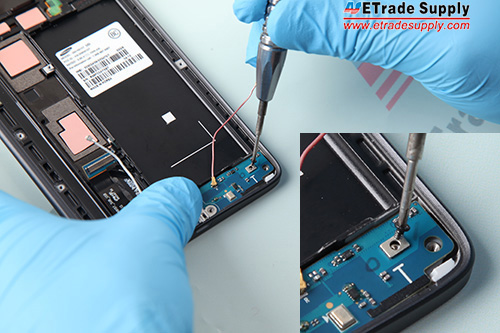
3. Connect the rear facing camera flex cable to the mother board.
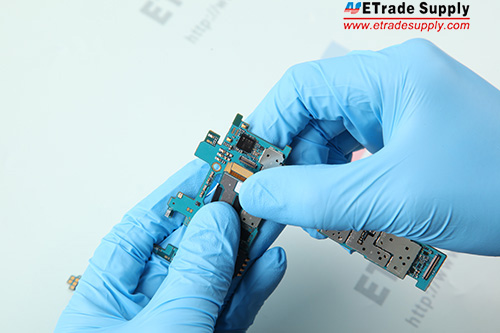
4. Insert the volume button flex cable.
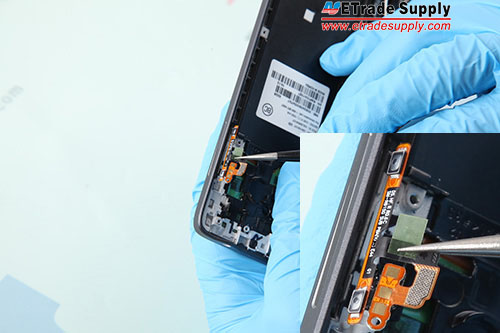
5. Insert the earphone jack to the slot.
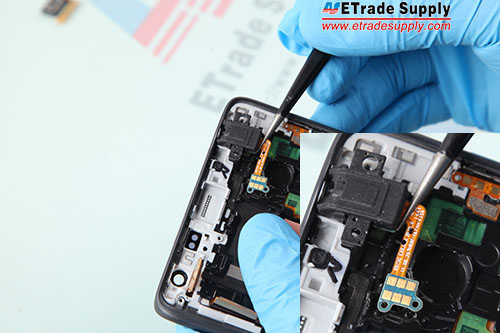
6. Put the vibrating motor into the front housing.
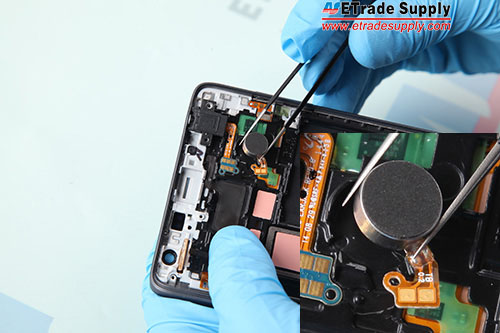
7. Put the ear speaker into the front housing.
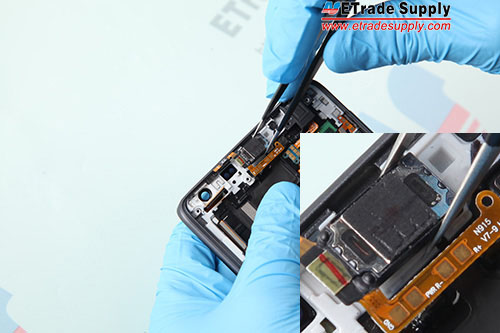
8. Insert the proximity sensor into the slot.
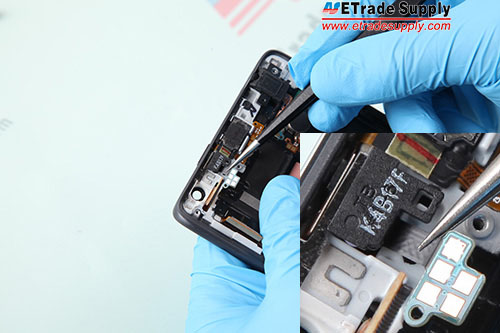
9. Put the front facing camera into the front housing.
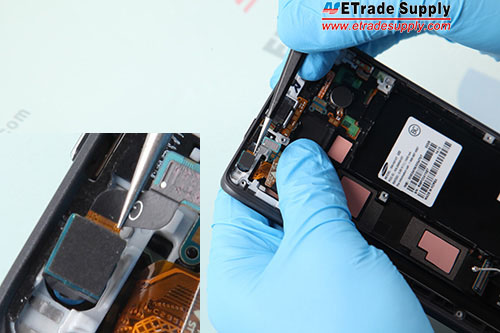
10. Connect the charging port flex assembly to the motherboard, then put the motherboard in the housing. (Notice: Take care of the front facing camera flex cable and other flex cables in the top of the housing. Handle carefully. )
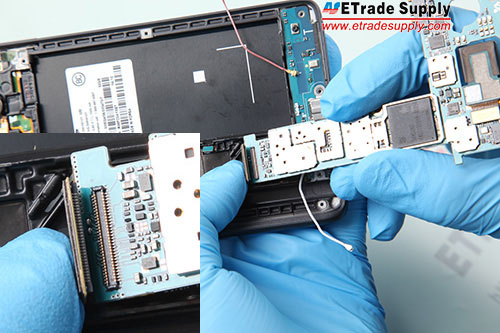
11. Connect the front facing camera flex cable, proximity sensor flex cable, digitizer flex cable and 2 antennas to the mother board.
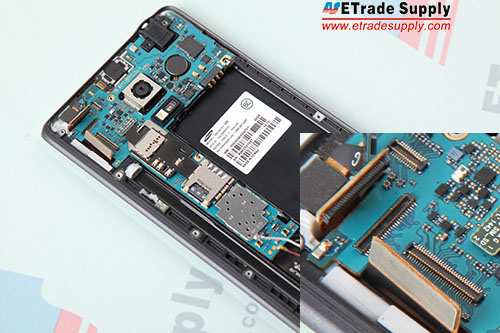
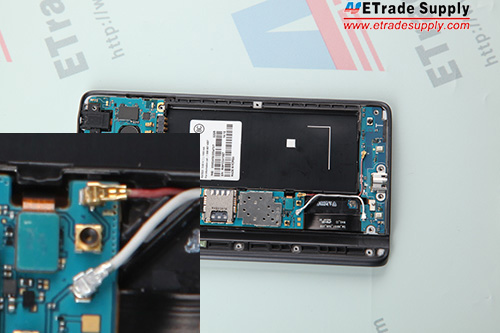
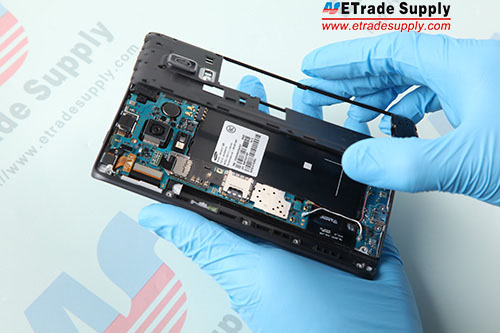
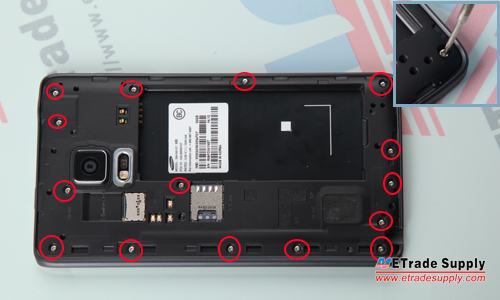
12. Cover the rear housing, then fasten it with 15 screws.
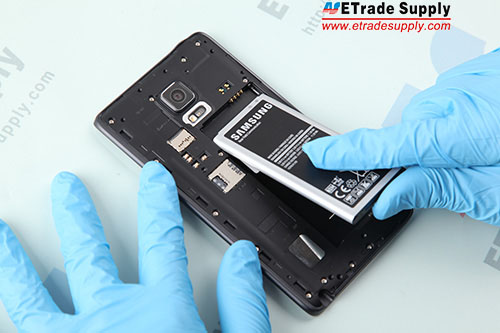
13. Put the battery in and cover the battery door.
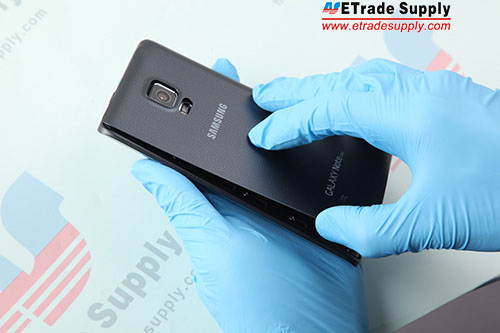
14. Insert the stylus.
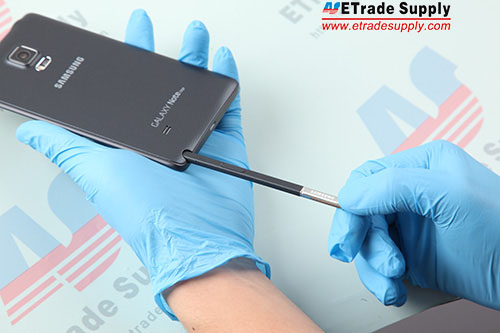
The Samsung Galaxy Note Edge reassembly is finished.
2015年1月9日星期五
How to Reassemble Nexus 6
How to Reassemble Nexus 6
Everyone can use only once this coupon code: ETS3D7DK for extra discounts on http://www.etradesupply.com on order over $50 before February 10, 2015
After disassembled the Nexus 6, we found that some parts are integrated orderly. Some parts such as the vibrator and the loud speaker can’t be torn down, and the Nexus 6 LCD screen and digitizer flex cables are connected in a totally different way, compared to other Android phones. Pay attention to the flex cables, they need to be clipped. Though the whole tear down process is not difficult, we still recommend people who has related DIY skill and experience to do it.
Tools Needed:
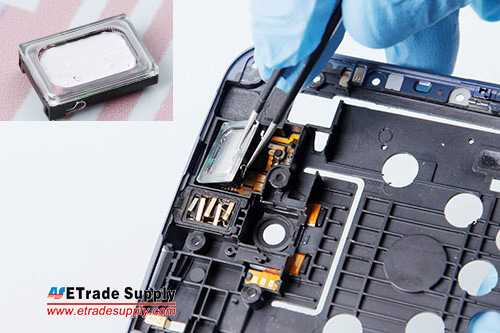
1. Insert the earphone jack and ear speaker. (Notice: Don’t scratch the flex ribbon underneath.)

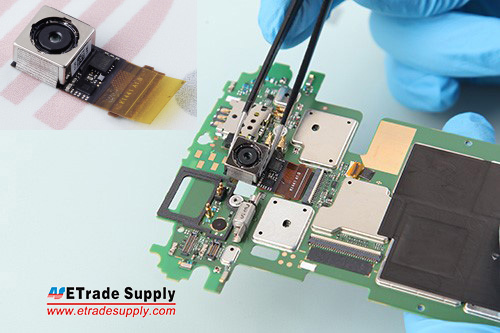
2. Assemble the rear facing camera and front facing camera to the mother board, then connect the camera flex cables.
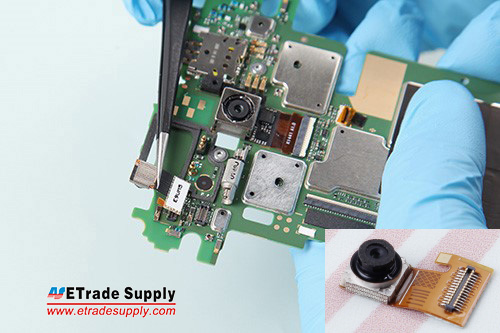
3. Assemble the logic board and LCD screen assembly. You need to put the logic board on the LCD screen and digitizer assembly, then connect the LCD flex cable and digitizer flex cable to the logic board. Fasten 1 screw in the metal bracket on the mother board. (Notice: flex cables are sensitive and fragile. Handle carefully.)
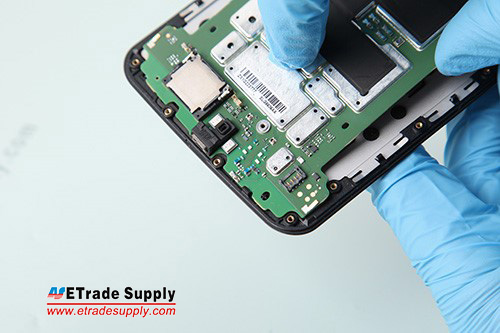

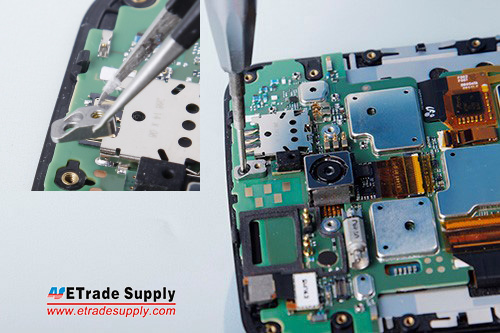
4. Install the side keys. Insert the side keys flex cable and keys into the opening, then fasten 1 screw in the metal bracket.
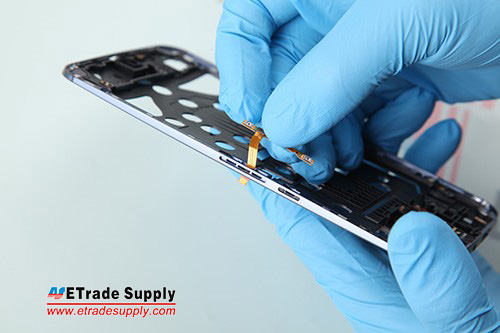
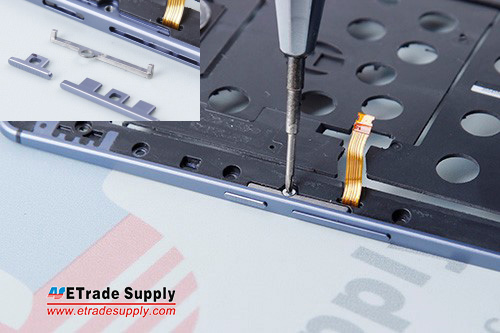
5. Adhere the battery on the rear housing with 3M adhesive. Also, you need to adhere the flex cable on the right place.
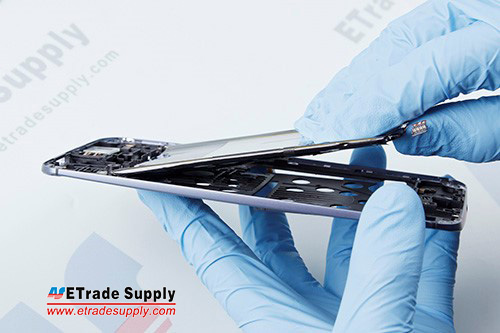
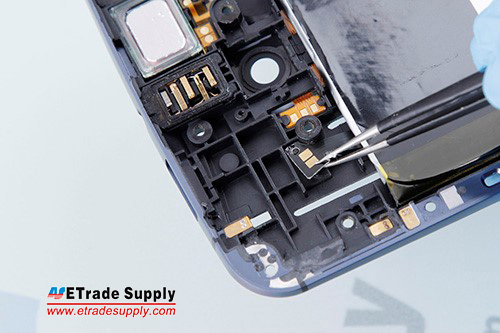
6. Assemble the rear housing, battery, main board and LCD screen assembly. Then connect the flex cable at the bottom of battery to the mother board and connect the extension flex cable ribbon with the side key flex cable and logic board.
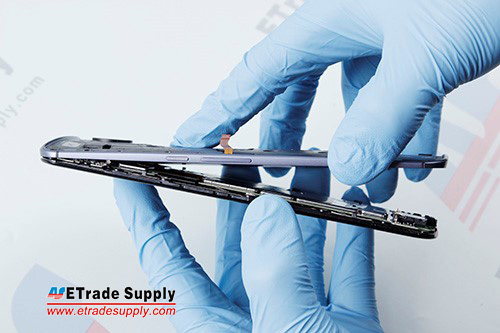
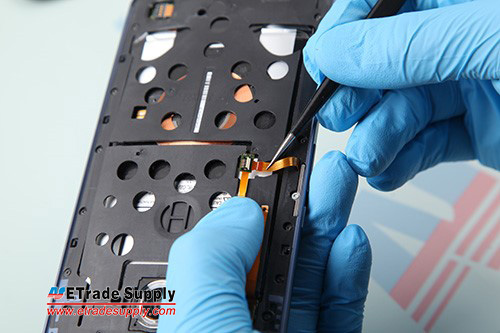
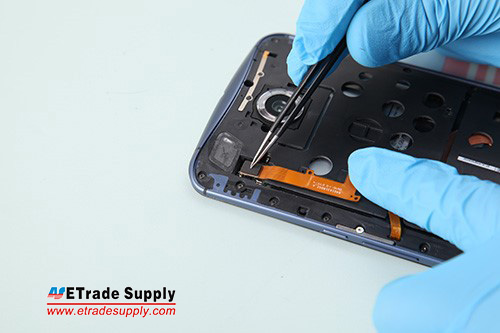
7. Cover 2 gasket on the rear housing, then fasten 22 screw to the rear housing.
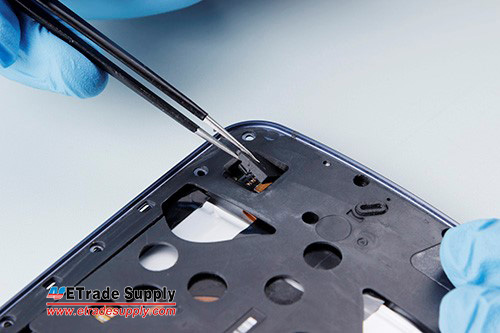
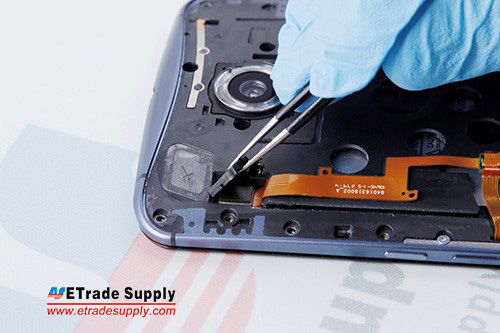
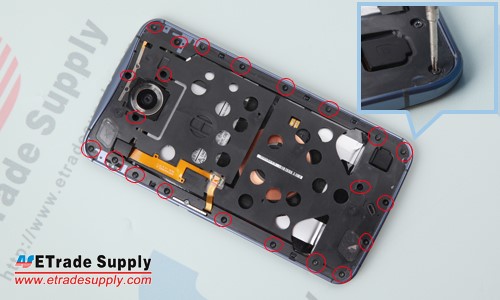
8. Adhere the battery door with 3M adhesive, then insert the SIM card tray.
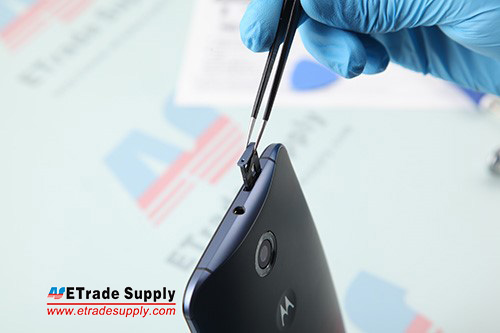
The Motorola Nexus 6 reassembly is finished.
订阅:
博文 (Atom)