How to Repair A Samsung Galaxy Note 4 Screen
ATTENTION!!!!
1.Everyone can use this coupon code: ETS3D7DK for orders on www.etradesupply.com over $50.
2.Everyone can use this coupon can use it only once.
3.The due date of this coupon is February 10, 2015.
Here we show you how to repair your Samsung Galaxy Note 4 screen step by step. According to our experience, broken screens are the most common issue among our customers and the average Samsung smartphone user, so we hope this article helps. Please share this with your friends and family if you find it helpful. All Samsung Galaxy Note users can use this article as a guide as the repair process is nearly the same.
Tools Needed:
Replacement needed:
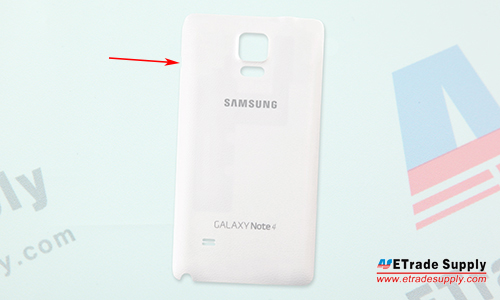
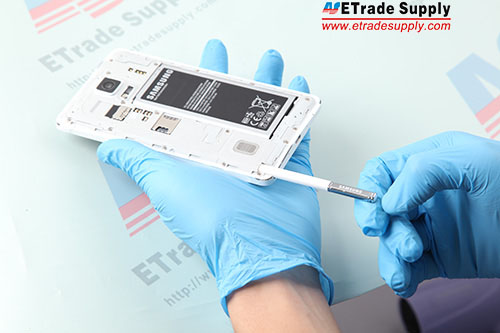
1. Remove the Galaxy Note 4 Battery Door.
● Power off the device;
● Pull out the S Pen stylus;
● Pull the battery door out through the small gap between the power button and the battery door.
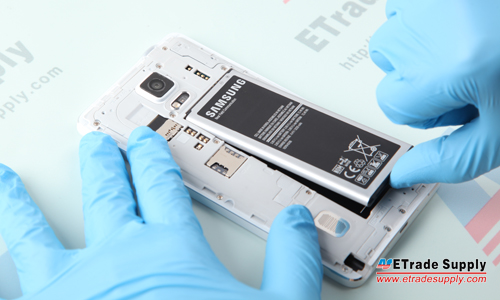
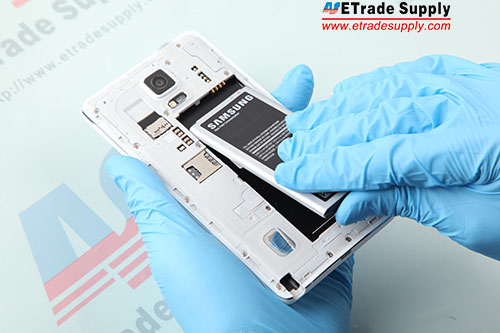
2. Remove the Galaxy Note 4 Battery.
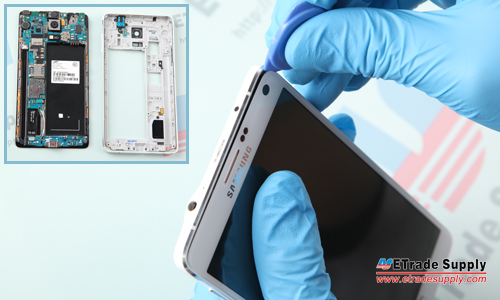
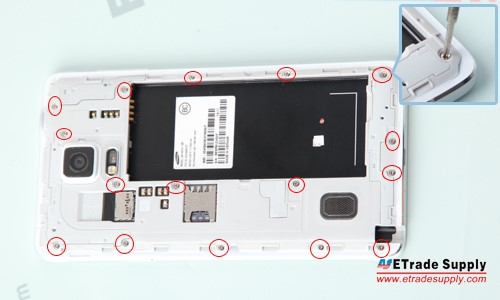
3. Remove the Galaxy Note 4 Rear Housing.
● Undo the 16 screws in the rear housing;
● Insert the case opening tool to take out the rear housing.
Notice: The loudspeaker assembly is located in the rear housing and difficult to remove.

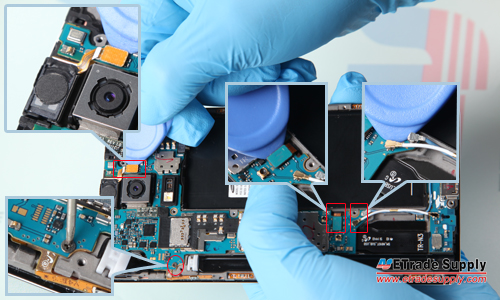
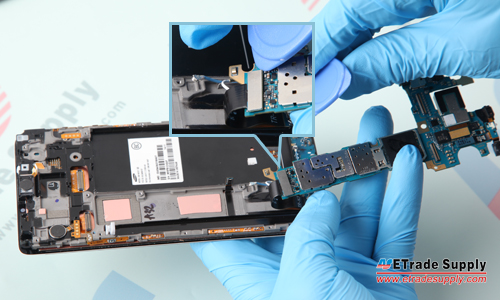
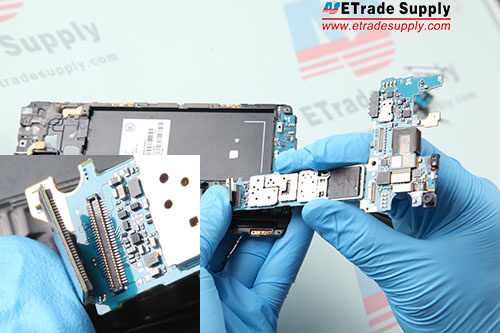
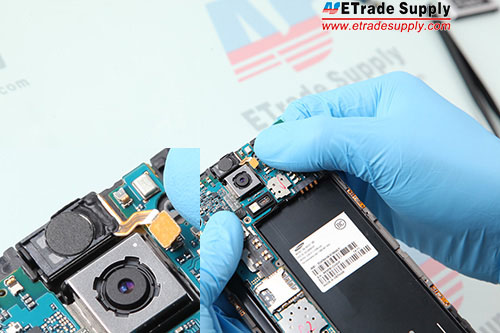
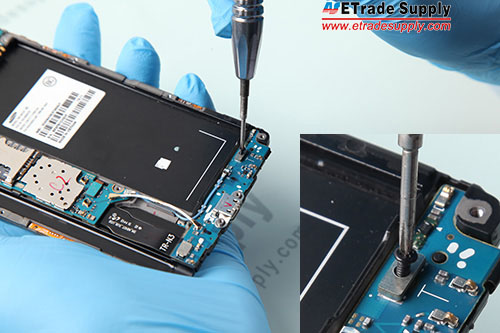
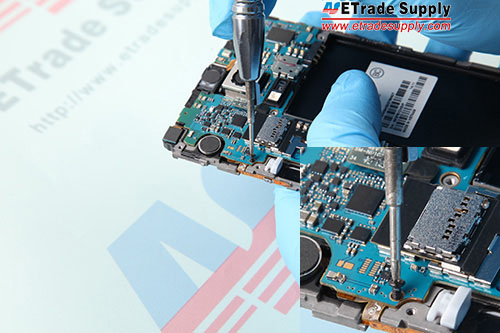
4. Remove the Galaxy Note 4 Motherboard.
● Pry up the 4 connectors;
● Undo the screw;
● Remove the upper portion of main board and pry up the connector.
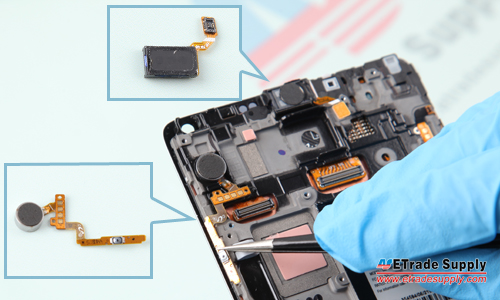
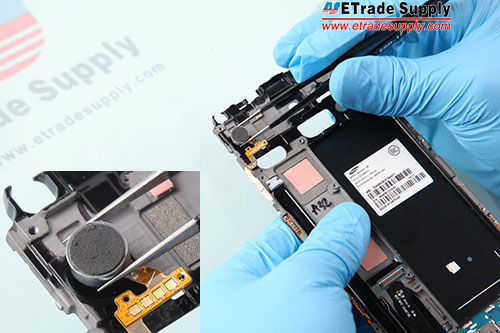
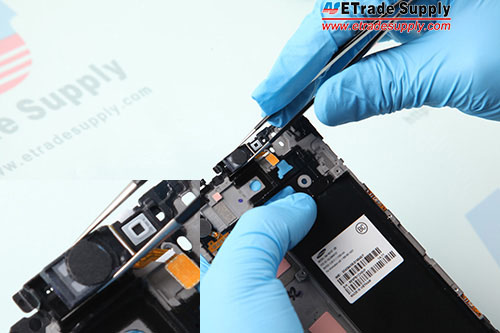
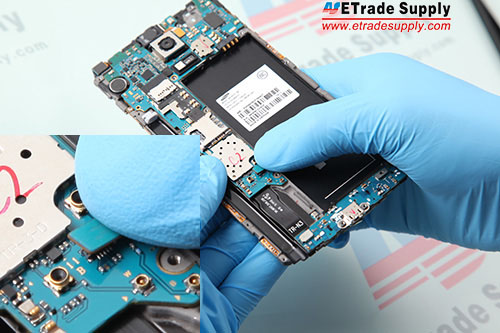
5. Remove the Galaxy Note 4 Small Parts.
● Remove the vibrating motor with power button flex;
● Remove the ear speaker with flex;
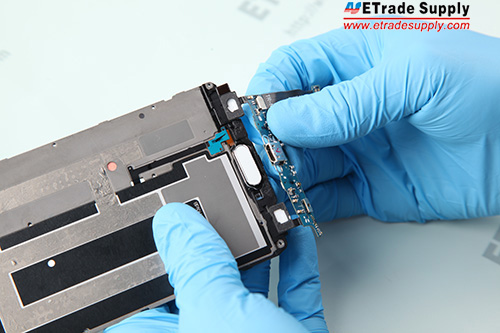
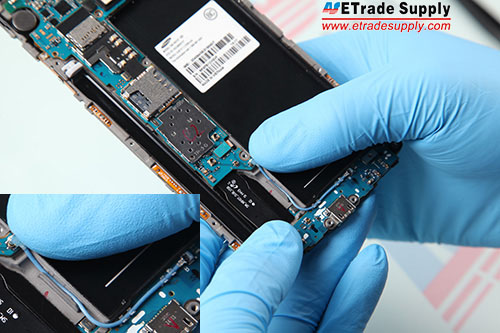
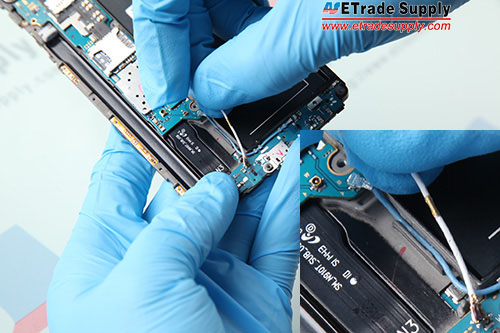
6. Remove the Galaxy Note 4 Charging Port Assembly.
● Pry up the 2 connectors;
● Undo the screw;
● Pry up the charging port assembly and then pry up the two connectors.

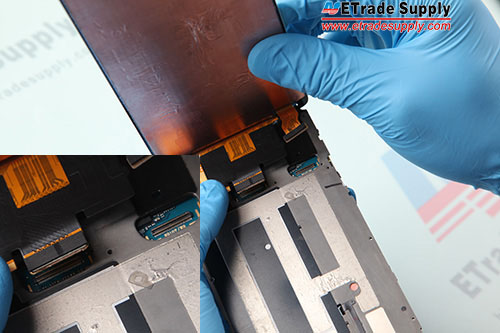
7. Remove the Galaxy Note 4 Middle Plate.
● Heat up the LCD and Digitizer assembly for 2 minutes to soften the adhesive;
● Insert the case opening tool to remove the middle plate.
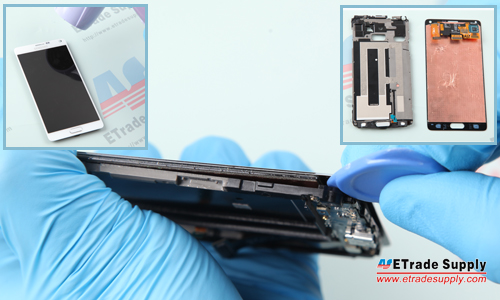
Notice: At this step, you have torn down the broken LCD screen and digitizer assembly, then you can replace a BRAND NEW Samsung Galaxy Note 4 LCD screen and digitizer assembly.
8. Adhere Samsung Galaxy Note 4 front housing adhesive to the middle plate, then connect the LCD screen flex cable and digitizer flex cable to the mother board.
9. Insert the vibrating motor with power button flex in the slot.
10. Put the ear speaker with flex into the slot.
11. Put the mother board in the slot and connect the Galaxy Note 4 Charging Port Assembly to the mother board.
12. Connect the ear speaker with flex cable to mother board.
13. Connect the home button flex ribbon to the mother board.
14. Connect 2 antennas to mother board.
15. Fasten 1 screw in the charging port assembly.
16. Fasten 1 screw in the mother board.
17. Cover the rear housing and fasten 16 screws in the rear housing.
18. Put the battery in and insert the stylus to the rear housing.
19. Cover the battery door, then you have replaced the Samsung Galaxy Note 4 LCD screen and digitizer assembly.
没有评论:
发表评论