How to Replace Your Broken iPad Air 2 Screens within 10 Minutes
Everyone can Use Coupon Code(ETS8OIID) for orders over $50 to buy brand new original cellphone replacement parts at www.etradesupply.com
iPad Air 2 is the thinnest but most powerful iPad ever which means much lesser room has been left for the inner parts. Will that cause it more difficult to be fixed? As a tablet with a 9.7 inches screen, the most possible damage is breaking the screen accidently. Let Apple to replace your broken iPad air 2 screen will cost you as high as $379, which is twice as much as a 10 minutes DIY screen replacement (Buy the iPad air 2 LCD and digitizer screen assembly here ). Here we will walk you through a step by step iPad air 2 screen replacement guide and hope this could help.
Tools Needed:
A pair of Tweezers
T4 Phillips Screwdriver
Suction Cup
Case Opening Tool
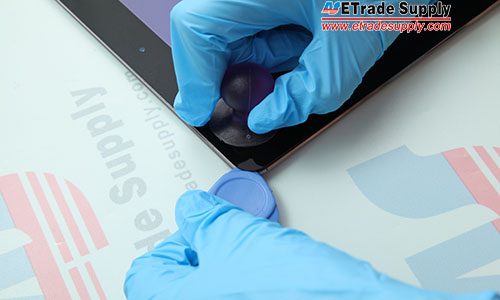
1.Heated the iPad air 2 screen edge up to melt the adhesive for 3 minutes, then pry up the screen with the suction cup and case opening tool. (If your screen shattered badly, please use a plastic adhesive tape to cover it in order not to make any further damage)

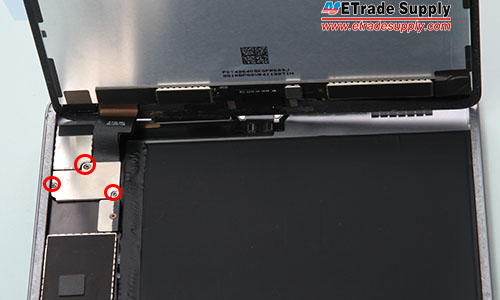
2.After the iPad air 2 screen assembly has been opened, undo 3 screws and remove the metal bracket covering the flex cables.
2.After the iPad air 2 screen assembly has been opened, undo 3 screws and remove the metal bracket covering the flex cables.
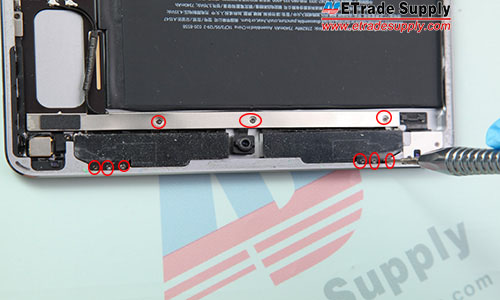
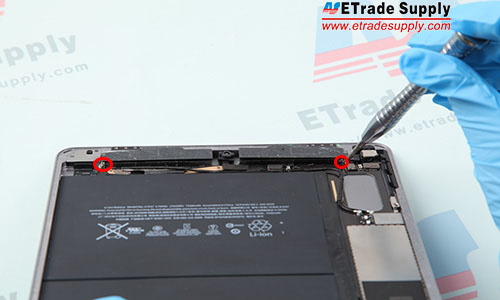
3.Undo 6 screws holding the antenna module and 3 screws in the metal bar.
4.Peel off the adhesive and undo the screw under the adhesive.
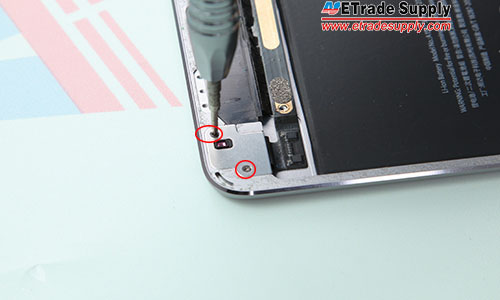
5.Undo 2 screws inside the bracket.
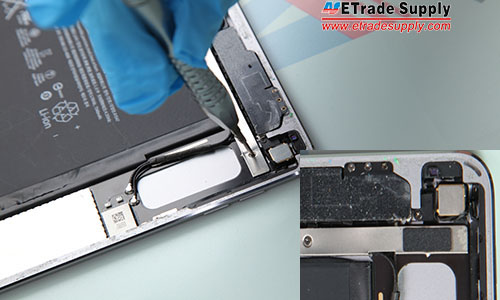
6.Disconnect the antenna, then remove the antenna module.
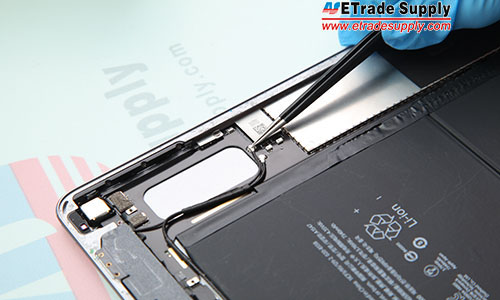
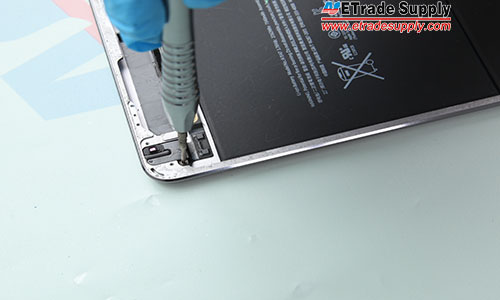
7.Disconnect the front facing camera flex cable and remove the front facing camera.
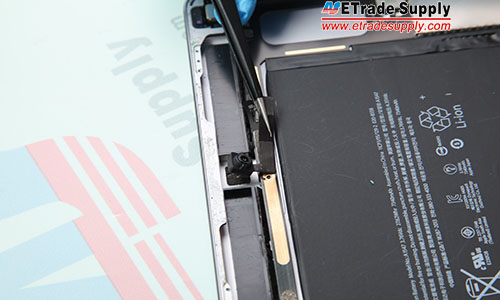
8.Disconnect the headphone jack flex cable.
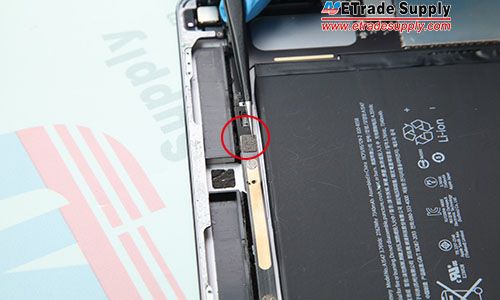
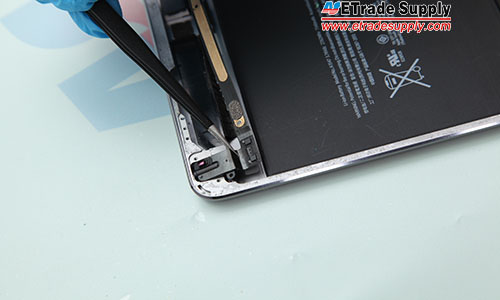
9.Undo 2 screws in the headphone jack bracket.
10.Undo the screw under the bracket.
11.Remove the headphone jack flex cable assembly.
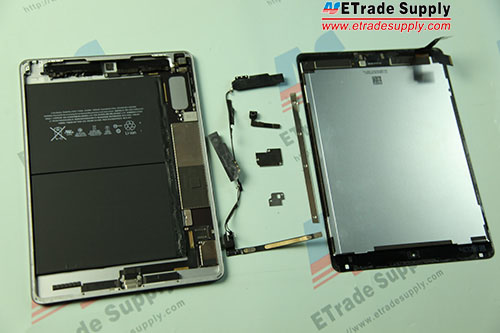
Because the mother board is stuck to the back housing by strong adhesive, it’s high risk to remove the motherboard and special tools and skills are needed. We don’t recommend people to tear down the part by himself (herself). So does the battery.
没有评论:
发表评论