How to Disassemble/Tear Down/Take Apart iPhone 6
Tools Needed:
Screwdriver
Plastic Spudger Tool
Tweezers
Case Opening Tool
Suction Cup Tool
You can use coupon code(ETS8OIID) to buy products at http://www.etradesupply.com/

1. Power off the Apple iPhone 6.

2. Undo the 2 charging port screws. (Notice: there’re lots of different screws inside, mark when disassembling in case of confusion.)

3. Use the suction cup tool and case opening tool to separate the LCD assembly from rear housing assembly. (Notice: be careful not to break the flex ribbons.)


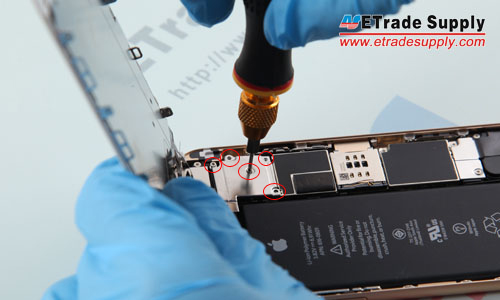
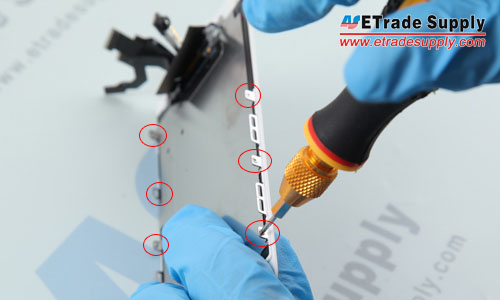
4. Undo the 5 screws that locking the metal cover above LCD and Digitizer flex ribbon connectors.
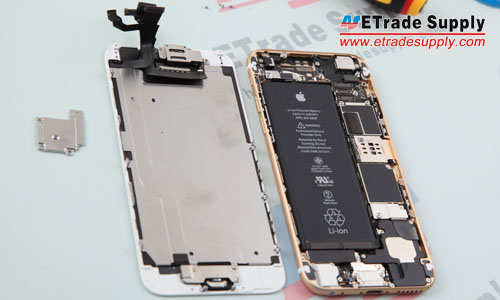
6. The iPhone 6 LCD assembly and rear housing assembly are separated.
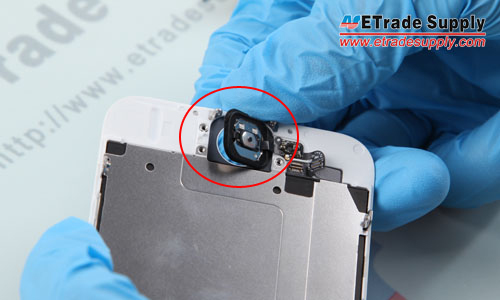
7. Undo the 3 screws of home button bracket.
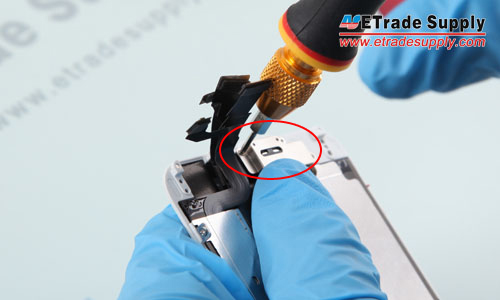
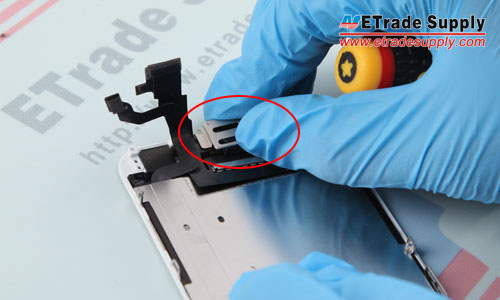
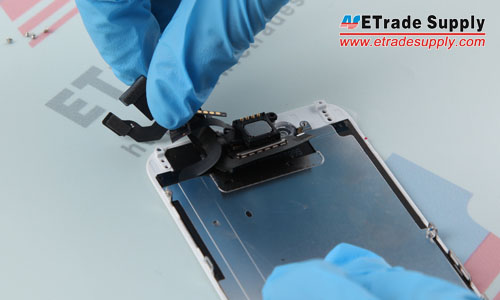
8. Pry up the home button flex ribbon connector, gently poke the home button and take it out.
9. Undo the 2 screws that locking the metal cover above ear speaker and front facing camera.
10. Remove the front facing camera and the ear speaker.
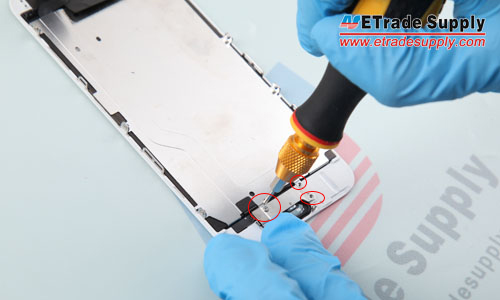
11. Undo the 6 screws that locking LCD frame and LCD back plate.
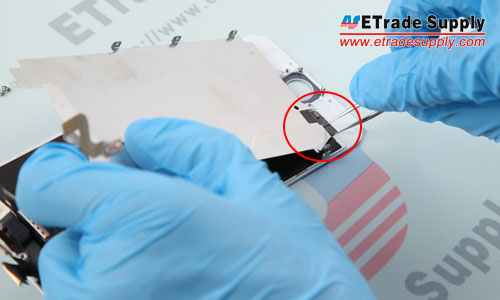
12. Use tweezers to pick up the flex cable and remove the LCD back plate.
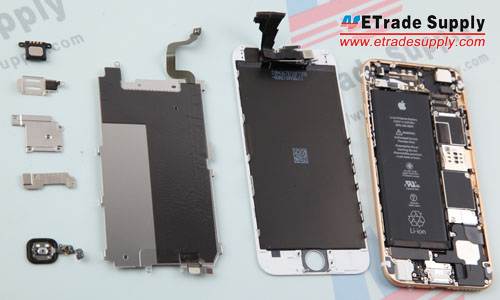
13. Separated LCD assembly, metal plate and rear housing assembly.
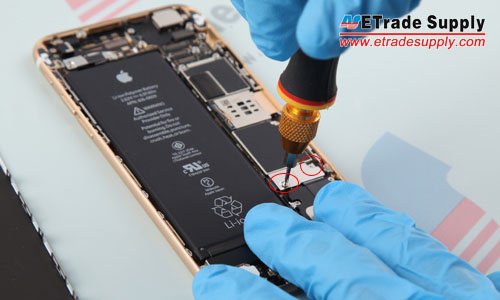
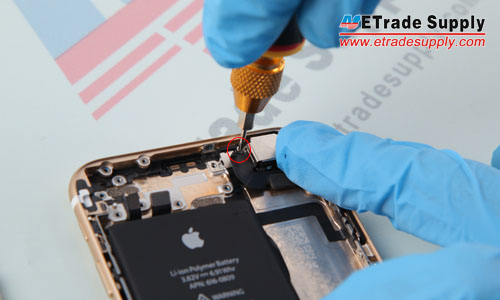
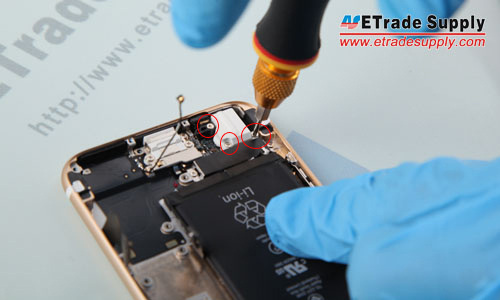
14. Undo the 2 screws that locking the metal cover above battery connector and loud speaker connector.
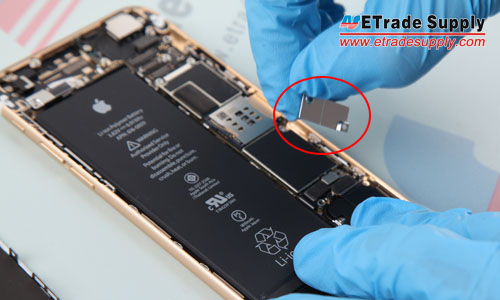
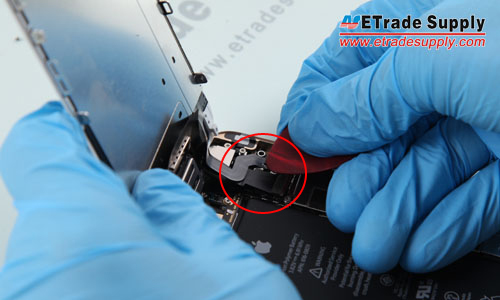
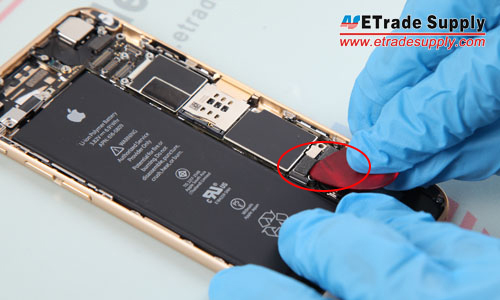
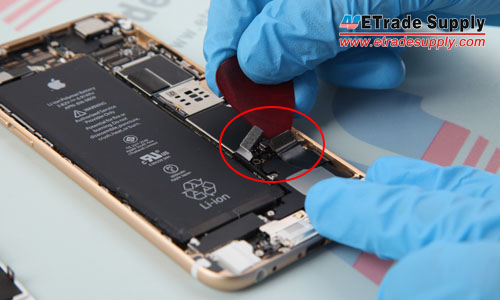
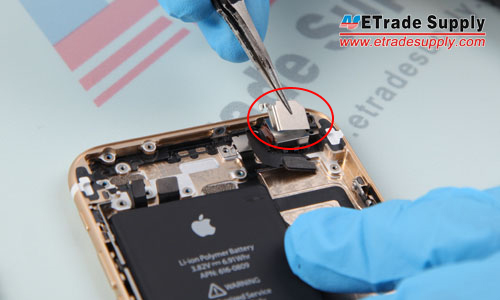
15. Pry up the connectors.
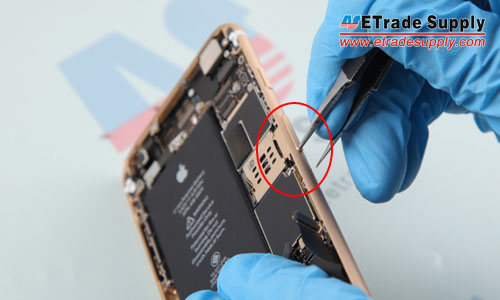
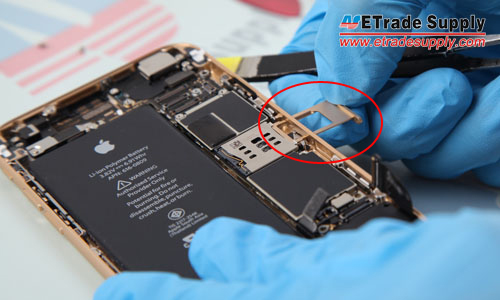
16. Use an eject pin or the tweezers to poke and take out the SIM card tray.
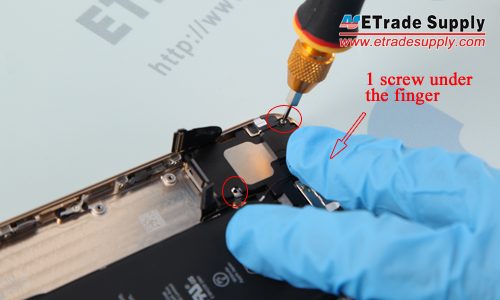
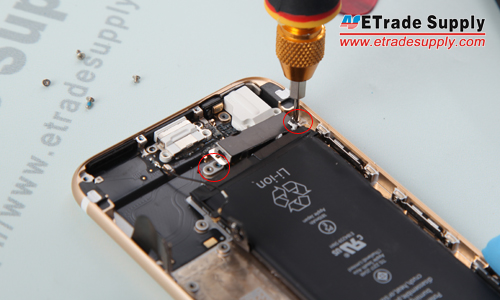
17. Undo the 2 screws that locking the metal cover above power button flex connector and volume button flex connector.
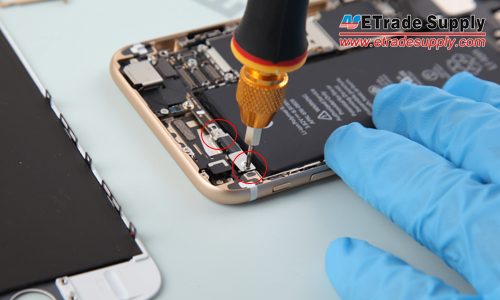
18. Undo the 10 screws that locking the motherboard. (Notice: there’re 2 screws under the black small part.)

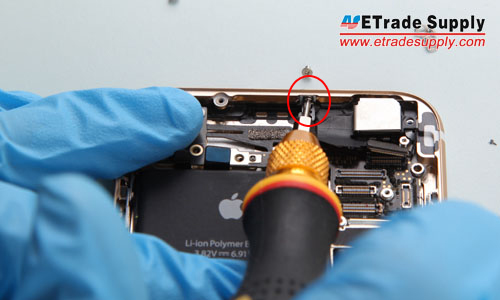
19. Pry up the power button flex connector and volume button flex connector.

20. Undo the screw on the top of iPhone 6.
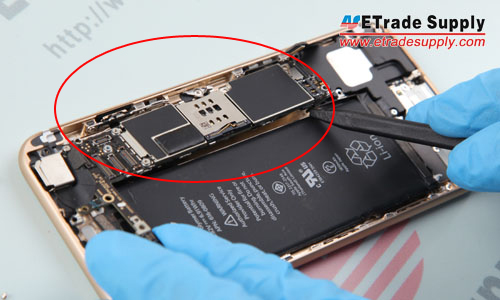
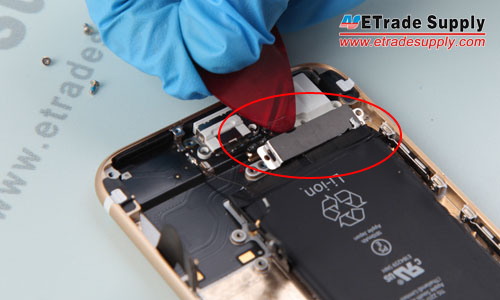
21. Remove the motherboard.
22. Undo the 2 screws that locking the metal cover above the rear facing camera, then remove the camera.
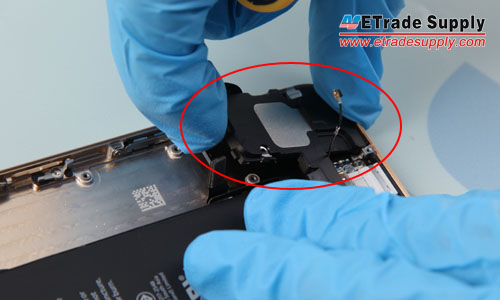
23. Undo the 3 screws and take out the loud speaker.
24. Undo the 3 screws that locking the earphone jack.
25. Undo the 4 screws that locking the charging port.

26. Undo the 2 screws and remove the vibrating motor.
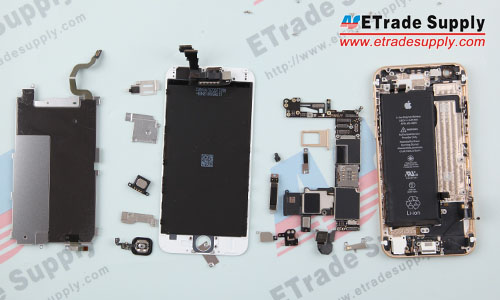
27. The iPhone 6 disassembly had been finished.
没有评论:
发表评论