显示标签为“disassemble cellphone”的博文。显示所有博文

2015年1月18日星期日

How To Disassemble Samsung Galaxy Note Edge

How To Disassemble Samsung Galaxy Note Edge


Everyone can Use Coupon Code(ETS3D7DK) for orders over $50 to buy brand new original cellphone replacement parts at www.etradesupply.com


The most distinct feature of the Samsung Galaxy Note Edge is the curved display, which is a new and quick way for users to access frequently used apps, notifications and other information all with the swipe of a thumb. What else is inside to make the device so special? Let’s tear down the Galaxy Note Edge and have a look.

1. Tweezers;
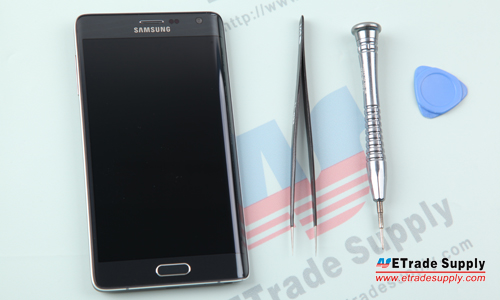
Note Edge Disassembly
1. Remove the Galaxy Note Edge S Pen.
● Power off the device;
● Pull out the S Pen stylus.
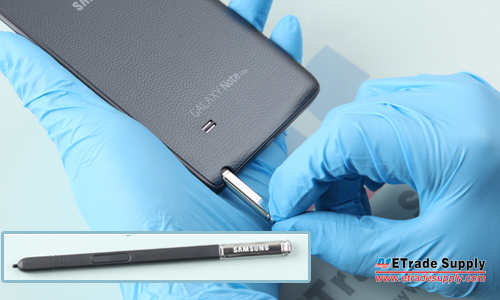
Note Edge S Pen Off
2. Remove the Galaxy Note Edge Battery Door.
● Pull the battery door out through the small gap between the power button and the battery door.
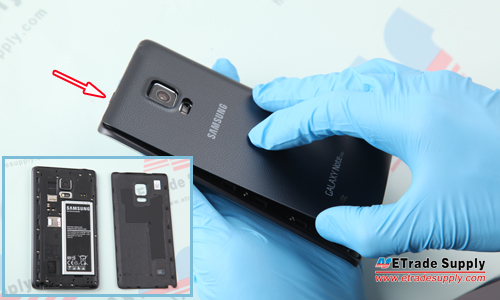
Note Edge Battery Door Off
3. Remove the Galaxy Note Edge Battery.
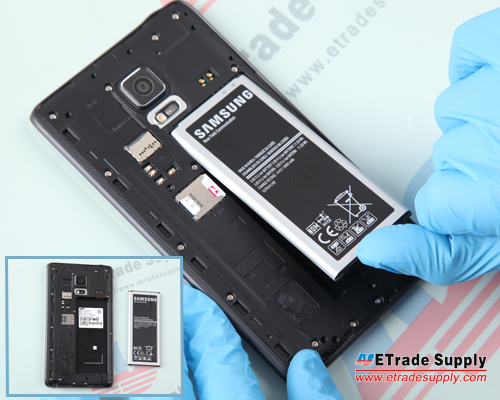
Note Edge Battery Off
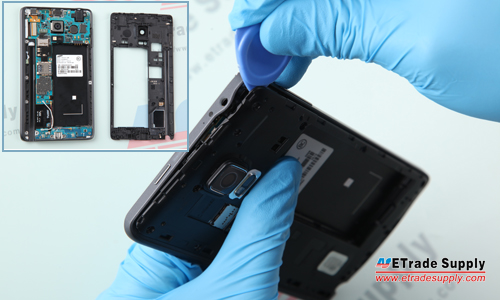
4. Remove the Galaxy Note Edge Rear Housing.
● Undo the 15 screws in the rear housing;
● Insert the case opening tool to take out the rear housing.
(Notice: The loudspeaker assembly is located in the rear housing and difficult to remove.)
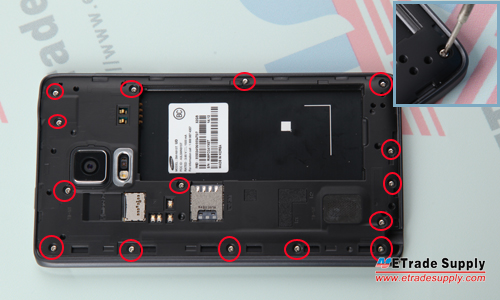
Note Edge Rear Housing Screw Off
Note Edge Rear Housing Off
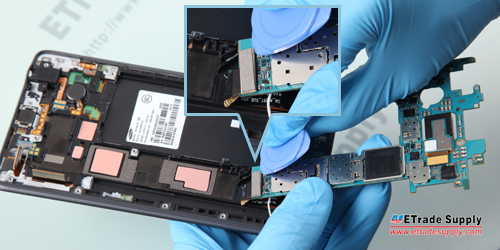
5. Remove the Galaxy Note Edge Motherboard.
● Pry up the 5 connectors;
● Release the upper portion of the motherboard;
● Pry up the connector on the back of the board to release the bottom part of motherboard.
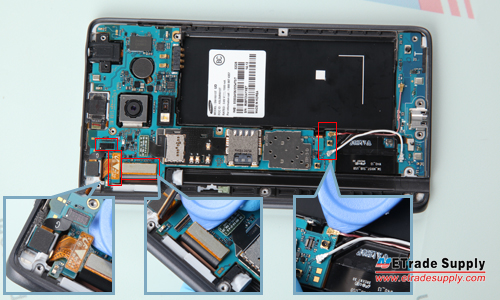
Note Edge Motherboard Connectors Off
Note Edge Motherboard Connectors Off 2
6. Remove the Galaxy Note Edge Rear-Facing Camera.
● Pry up the connector on the back side of the motherboard;
● Remove the back camera.
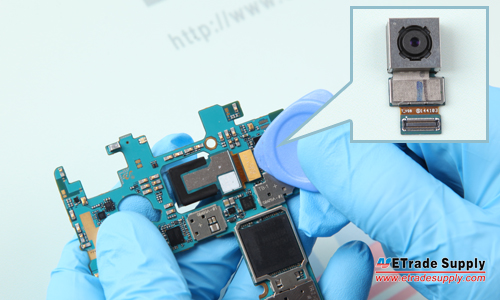
Note Edge Rear Camera Off
7. Remove the Galaxy Note Edge Charging Port Flex Assembly.
● Pry up the 3 connectors;
● Undo the screw;
● Release the USB charger port flex assembly.
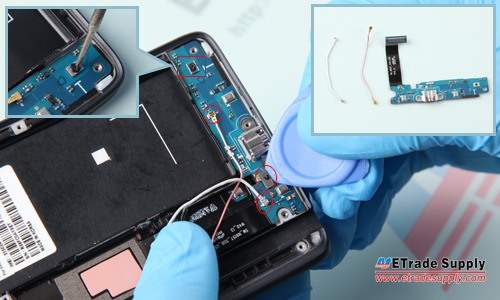
Note Edge Charging Port Flex Off
8. Remove Small Parts from the Galaxy Note Edge.
● Remove the front facing camera;
● Remove the proximity sensor;
● Remove the ear speaker with power button flex;
● Remove the vibrating motor;
● Remove the earphone jack;
● Remove the volume button flex.
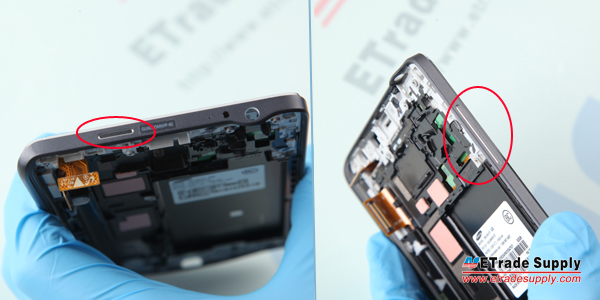
(Notice: The power button and volume button are assembled in the front housing and not easily removed.)
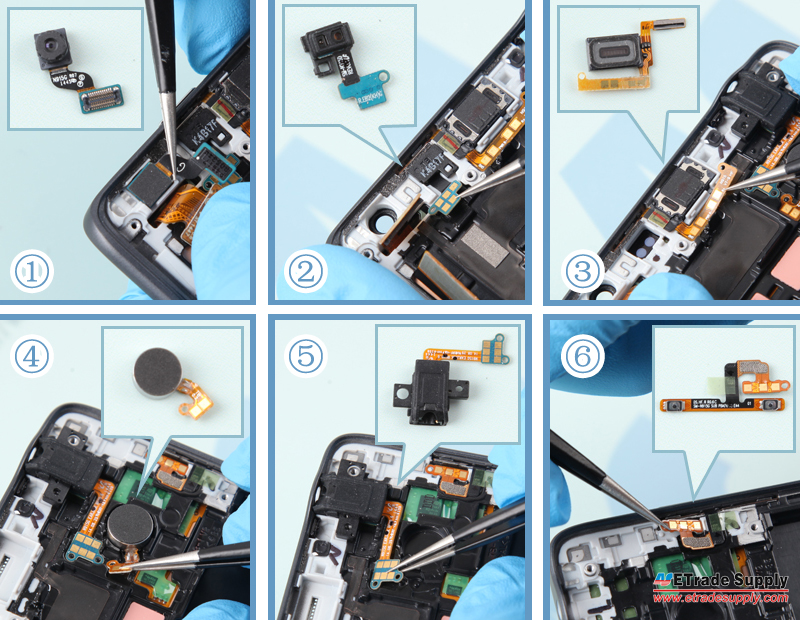
Note Edge Front Housing Small Partd Off
Note Edge Side Keys
The Galaxy Note Edge disassembly is now completed.
The front housing is attached to the Galaxy Note Edge LCD Touch Screen by a very strong adhesive; we do not recommend attempting to separate the frame from the LCD assembly, as it’s very difficult with a high risk of breakage.
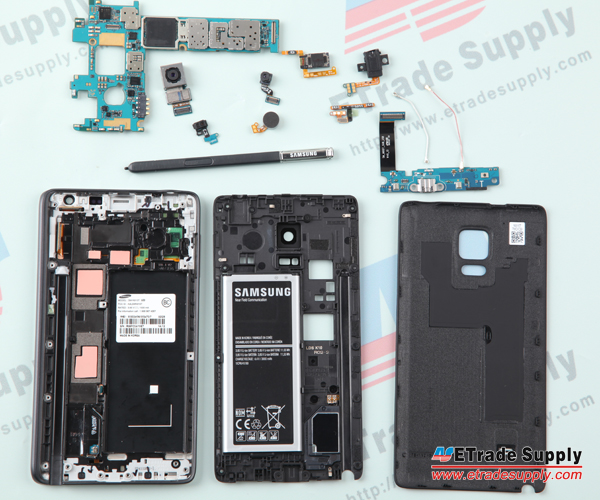
Note Edge Disassembly Finished

2015年1月9日星期五

How To Disassemble Nexus 6 In 10 Steps

How To Disassemble Nexus 6 In 10 Steps


Everyone can use this coupon code: ETS3D7DK for orders on www.etradesupply.com over $50.


Released in October of 2014, the Nexus 6 is the 6th generation smartphone in the Google Nexus family. The Nexus 6 runs the latest Android OS, Android 5.0 “Lollipop” and will be the first Nexus device to support T-Mobile’s Wi-Fi calling which will arrive in early 2015. As it’s manufactured by Motorola, the Nexus 6 features similar hardware as the Moto X 2nd, let’s tear down the device and have a closer look.

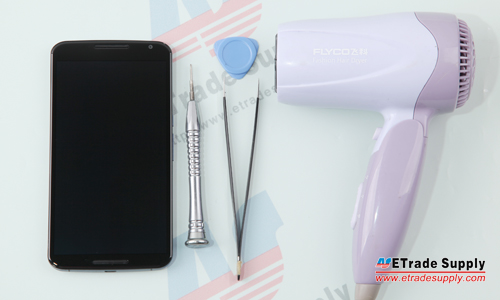
Tools Needed:
1. Hair Dryer / Heat Gun;
2. Tweezers;
Nexus 6 disassembly

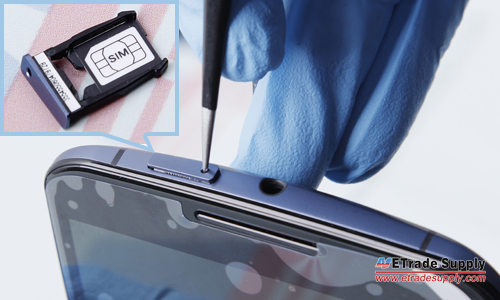
1. Remove the Motorola Nexus 6 SIM Card Tray.
● Power off the device;
● Use an eject pin or tweezers to release the SIM card tray.
Nexus 6 take out sim card tray

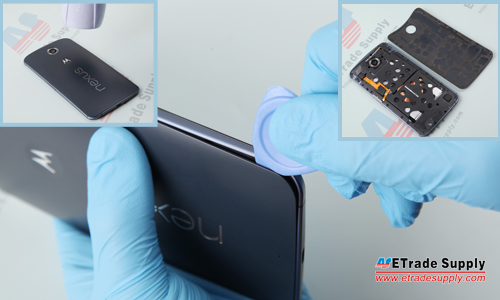
● Heat up the battery door for 2 minutes to soften the battery door adhesive;
● Insert the case opening tool and pry up the battery door.
Nexus 6 pry up battery door

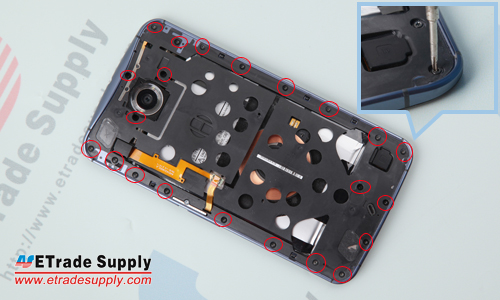
3. Remove the Motorola Nexus 6 Rear Housing Assembly.
● Undo the 22 screws in the rear housing as shown below;
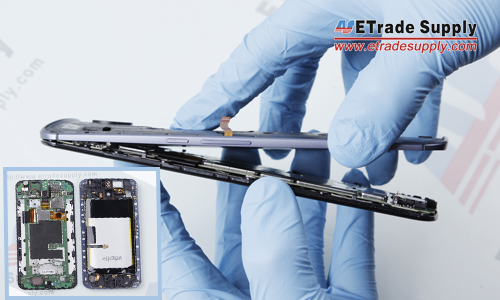
● Gently remove the rear housing assembly from the screen assembly.
Nexus 6 rear housing screws
Nexus 6 take out rear housing

4. Release the Connectors in the Rear Housing.
● Remove the gasket on the rear housing near the bottom of the phone;
● Carefully pry up the flex ribbon connector underneath;
● Remove the gasket on the rear housing near the top of the phone;
● Carefully pry up the flex ribbon connector underneath.
Nexus 6 (56) Nexus 6 (57)

5. Release the Flex Cable Ribbon Extender.
●  Carefully pry up the latch on the flex connector to separate it from the flex ribbon extender.
 Nexus 6 Pry up connector 3
6. Remove the Motorola Nexus 6 Battery.
● Heat up the rear housing for 10 seconds to soften the battery adhesive;
(Notice: be more careful on this step as batteries might explode when overheated.)
● Pry up the battery flex connector that adhered to the rear housing;
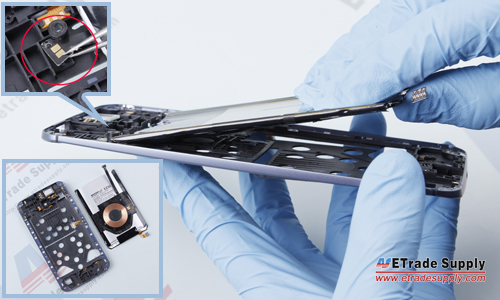
● If you want to release the wireless charging coil as well, gently pry up the charging coil connector. However, we don’t recommend performing this step as you run a high risk of damaging the charging coil and battery.
 Nexus 6 heat up battery
 Nexus 6 take out battery

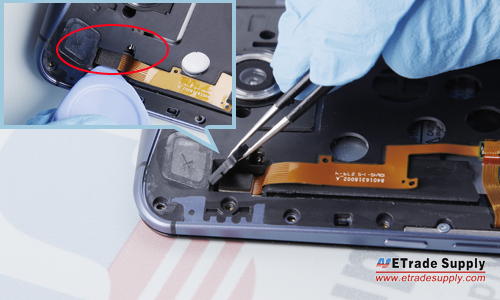
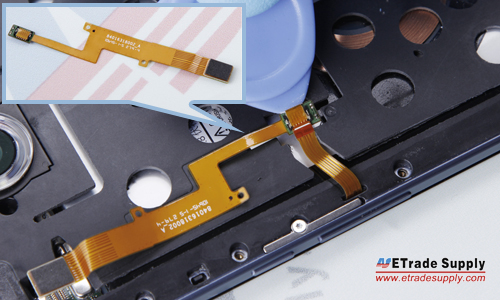
7. Release the Motorola Nexus 6 Side Keys.
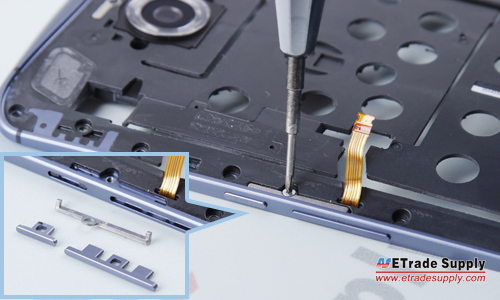
● Undo the screw that locks the side key metal bracket;
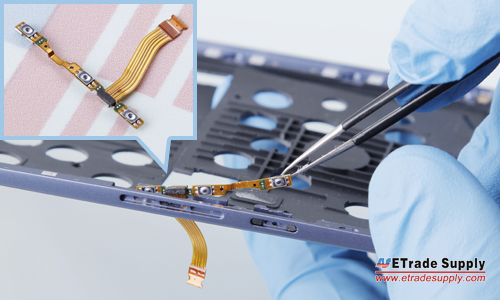
● Remove the side key flex cable ribbon.
Nexus 6 undo side key screw

Nexus 6 take out side key flex

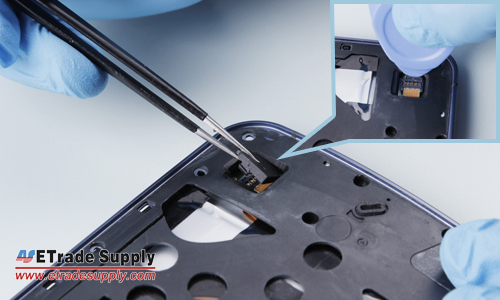
8. Remove the Motorola Nexus 6 Motherboard.
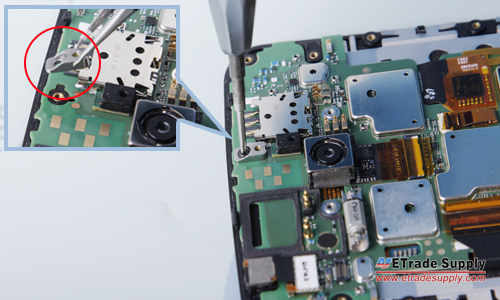
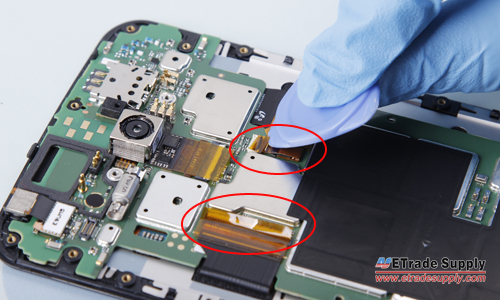
● Undo the screw and metal bracket that locks the front housing and main board;
● Pry up the LCD flex connector and digitizer connector;
● Remove the motherboard.
Nexus 6 undo main board screw
Nexus 6 pry up main board connector

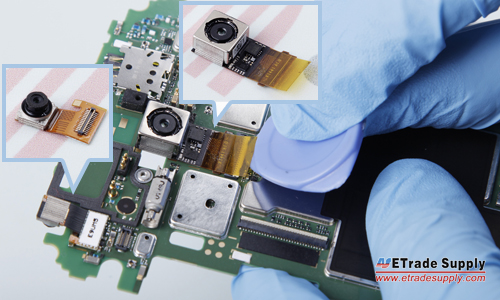
9. Remove the Motorola Nexus 6 Cameras.
● Pry up the rear facing camera flex connector;
● Remove the back camera;
● Pry up the front facing camera flex connector;
● Remove the front camera;
Nexus 6 motherboard view 2

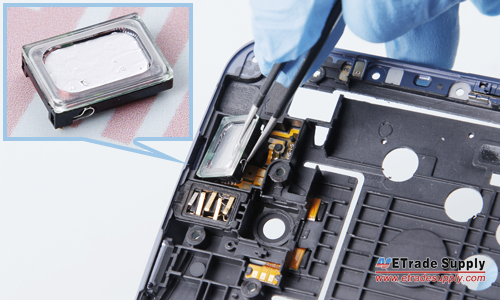
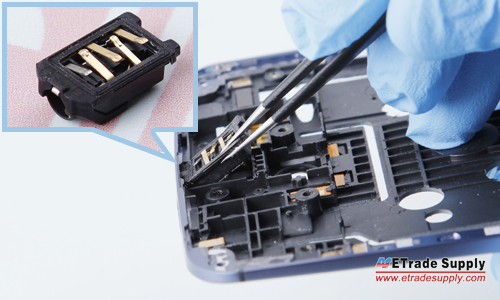
10. Remove the Motorola Nexus 6 Ear Speaker and Headphone Jack.
● Remove the front speaker.
(Notice: be careful not to scratch the flex ribbon underneath.)
● Remove the headphone jack.
(Notice: the headphone jack is strongly attached to the front housing with an adhesive.)
Nexus 6 take out ear speaker 2
Nexus 6 take out earphone jack
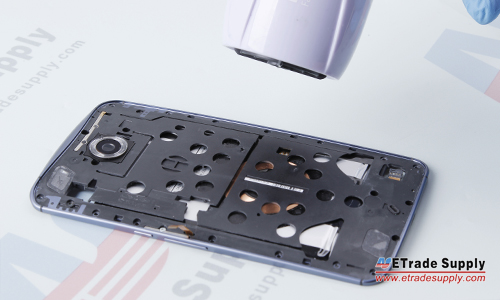
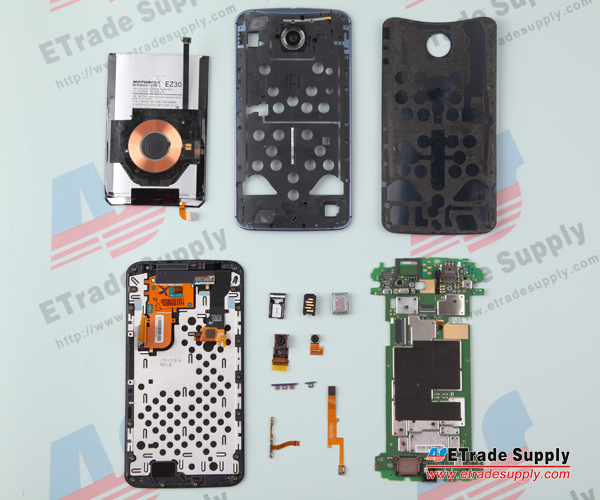
The Motorola Nexus 6 disassembly is now completed.
Nexus 6 disassembly done